Assembling a Retro Handheld Console
For a few years, I have dreamt of building my own arcade console. It has remained a dream because where I live, there's no space to build nor store one. Then I started getting interested in building desktop versions of an arcade console but the problem remains, there isn't space big enough to put it.
Motivation
A few months ago, I met up with an ex-student. Gavin was interested marketing Makerbuinos in Singapore. Makerbuino is a DIY handheld retro game console, by Albert Gajšak, an 18(!) year old student from Croatia who first made it available through Kickstarter.
Gavin brought a few Makerbuino kits back on his trip to Croatia earlier this year and I bought one and got to work straightaway on it. Makerbuino was a great educational kit. In the box, you get everything you need to fix up the Makerbuino, including soldering iron, soldering bits and screw drivers. Makerbuino is based on the Arudino, and plays a truckload of Atari-styled retro games that you can download here.
It took a few hours to complete, and as I wasn't the best craftsman in terms of soldering skills, I sought the help of my middle-age handyman Daniel, who helped me salvage several pins that I almost destroyed.
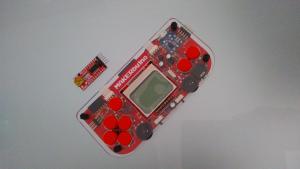
Here's my Makerbuino. If you want one, please go to Exploration Lab to look for Gavin and tell him that I sent you.
And here's a video of Zoe playing it.
I run all my projects through what is known as the "Zoe Test". Zoe's 8 this year. If Zoe can't figure it out, it has usability problems. If Zoe doesn't like it, it fails User Acceptance Test (UAT). Zoe figured how to turn on the Makerbuino by herself and played Pac Man for a while. It failed usability test because Zoe think the games were lame. I could understand because at 40, even I wasn't born in the era of Atari games. So I had to do better. I had to build a hand-held console that will play games that Zoe and I enjoy.
Adafruit Pigrrl 2
The Adafruit Pigrrl 2 is based on the Raspberry Pi, and runs Retropie, which is an all in one Raspbian, Emulation Station, RetroArch, emulators for SNES, Megadrive, Mame, Apple and several retro gaming devices and computers many of us grew up with. To build one was as straightforward as following the instructions on Adafruit's Pigrrl 2 page, buy the parts, 3D print the case and mashing everything up together - or so I thought.
Phase 1: Testing Retropie
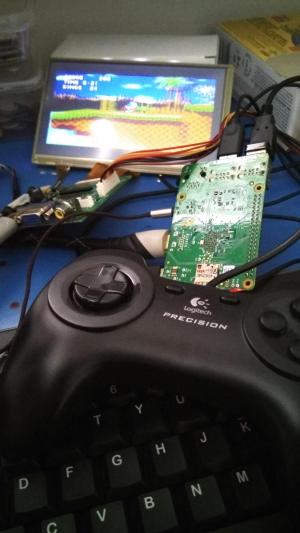
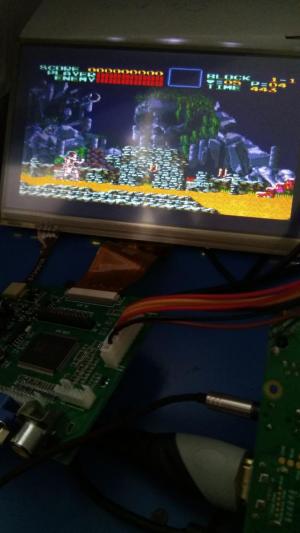
I had a Raspberry Pi Model B and an old LCD, keyboard and game pad lying in the house. So I put Retropie into my old Raspberry Pi, plugged in the keyboard and mouse. The idea was to figure if I liked what I saw so far. If I do, then I will continue building, or else I will move on. $0 investment at this point.
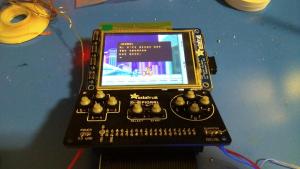
This was what I did. In the photo, I was playing Sonic the Hedgehog on an emulated Sega Mega Drive and Castlevania on SNES.
Time spent thus far: 2 hours (spent a while blowing dust off my Raspberry Pi, game pad and LCD screen)
And a video of me playing Bare Knuckles.
Phase 2: 3D Printing
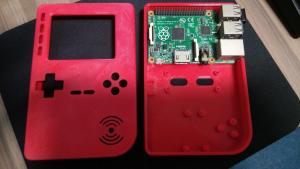
Adafruit provided the models of the Pi Grrl 2 casing to print. I didn't have a 3D printer and I wanted a good looking case, so I outsourced to Siege Advanced Manufacturing, who printed my case in PLA and soft buttons in TPU. Here's how it looked, much better than what it would have looked if I had printed in my regular maker-space.
Time spent thus far: 4 hours (I spent 2 hours at the maker space test printing my own casing before giving up and seeking help from professionals)
Phase 3: Purchasing the Parts
There were a few challenges. First, as I am in Singapore, it's too expensive to ship from Adafruit.com. It's a blessing Mouser ships to Singapore for free if you ordered more than SGD60 worth of parts. However, Mouser wouldn't ship batteries. I needed a 3.7v, 2000mAH lithium battery, which I found on SGBotics. Mouser didn't have every item on Adafruit, so I replaced some of them with my own selection.
Here's a BOM list (in xlsx) with the price that I paid and where I got them from. I figured this will be useful for folks living in our part of the world who wants to build one. Total cost without the Raspberry Pi is SGD169.11. If you are buying a Raspberry Pi from Singapore, you can get a Model B, Quad Core 1.2GHz CPU, 1GB RAM with WiFi/BLE on Element14.com for SGD52.50 on Element14. This will bring the total cost of your Pi Grrl 2 to SGD221.61 which really does make you think twice about embarking on a DIY project like this because a brand new state-of-the-art Nintendo 3DS XL cost only around SGD330, and you don't need to burn weekends fixing things up and to pass Zoe Test.
But fixing your own stuff up is a priceless experience.
Time spent thus far: 6 hours (Took a while shopping in the correct places, mostly because Mouser wouldn't ship my battery and few places sell high powered Lithium batteries in small form factors)
Phase 4: Fixing up the Parts
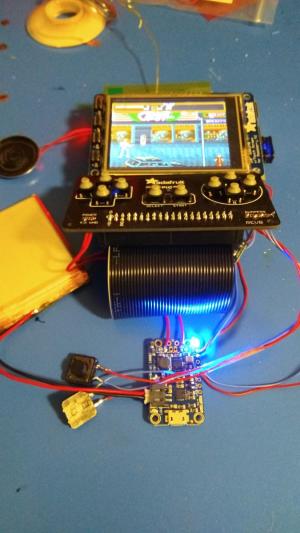
Here are some pictures of how the PiGrrl 2 looked like while it is being patched together. It was straight forward enough and I managed to get it working on the first try. Here are some pictures of it:
And a video of me getting really excited seeing it working.
Time spent thus far: 9 hours (It took 2 evenings to get here. I thought the worst part has passed. Nightmare was just beginning)
Phase 5: Casing It
The final step is to put everything into my 3D printed case, close it up and I am ready to play, right? Wrong. I met my fair share of challenges here:
- Driving screws into the PLA casing was a huge challenge. I didn't have the correct tools and the plastics started cracking as I was screwing. I gave up screwing the left and right buttons on the back of the casing and turned to glue gun. It worked wonders. 3 days after I squeezed hot glue into the case, every piece was still in tact. I will report back again in a month.
- Closing the casing was a pain. Adafruit suggested chopping up the PiCable so that it fits into the case. I was too lazy to do it and I learnt that what's keeping the casing from closing up nicely wasn't the PiCable but that the IDC Box Header was sticking out too much. I did some filing on the edges to make it go in.
- The TPU buttons were difficult to press. My fault entirely, Adafruit recommended Ninjaflex which was softer than TPU. I also learnt that I needed to screw the gamepad PCB precisely so that when the buttons are pressed, it touched the tactile buttons at all the right places. Middle-age men with butter fingers like me should never have attempted a project like this.
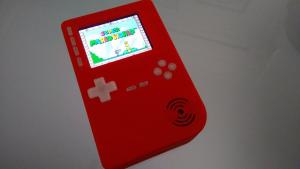
After much squeezing and refitting, here's my Pi Grrl 2.
Time spent thus far: 12 hours (I totally under-estimated the time it took to put the components into the case)
Aftermath
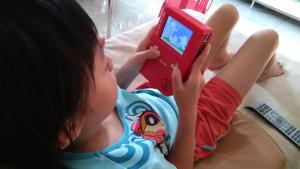
Here's Zoe, performing User Acceptance Testing (UAT) on the Pi Grrl 2.
And a video too.
The conversation follows like this:
Me: Do you like your new toy?
Zoe: Why are old games so slow, so boring? (threw the Pi Grrl 2 back and went back to the iPhone)
And UAT failed.
What's Next?
It was fun to put the Pi Grrl 2 together. I brushed up on a handful of forgotten skills of soldering, sanding, filing and screwing. The Pi Grrl 2 is toy that I will pick up to play with from time-to-time and in the process, reminisce the good of days of my youth.
The Pi Grrl 2 is an Adafruit design, but I am definitely keen in designing one of my own that will fit a 7 inch LCD screen at some point, but for now, it's time to clean out Zoe's table that I have hijacked for this project.
Update
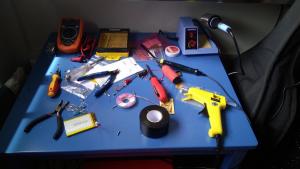
2 days after fixing up the Pi Grrl 2, Zoe is still reaching for the Pi Grrl 2 to play Sonic the Hedgehog. UAT didn't fail after all.


