

The Freelancer's Smart Contract: DApp Demo
The Freelancer's Decentralized Application
This is the 2nd part of a 4-part series that document my process of building a Decentralized Application (DApp) for freelancers to receive multiple partial payments for a project that he undertakes with a client.
For a step-by-step guide on the business logic of this process, refer to part 1 of this series. The source codes for the project can be found in the project's Github repository.
In the second part of this series, I will walk through the Decentralized Applications that lets the programmer and his client arrange payments, pay, and get paid in ETHs.
How It Works
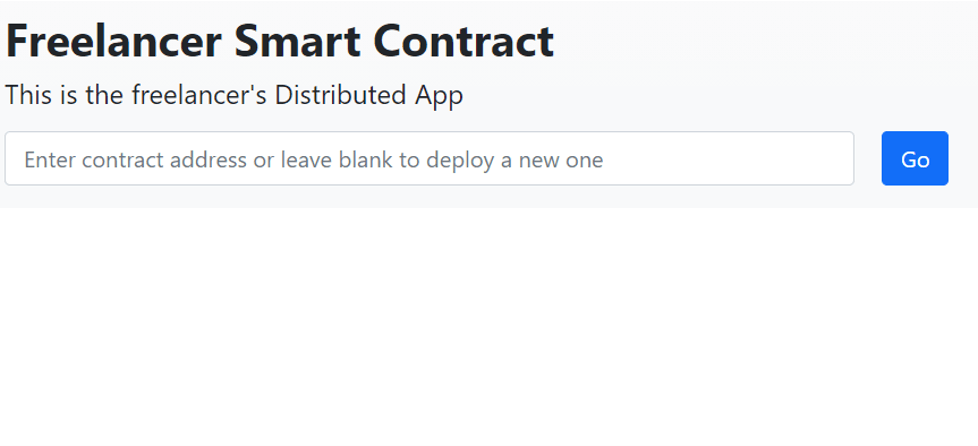
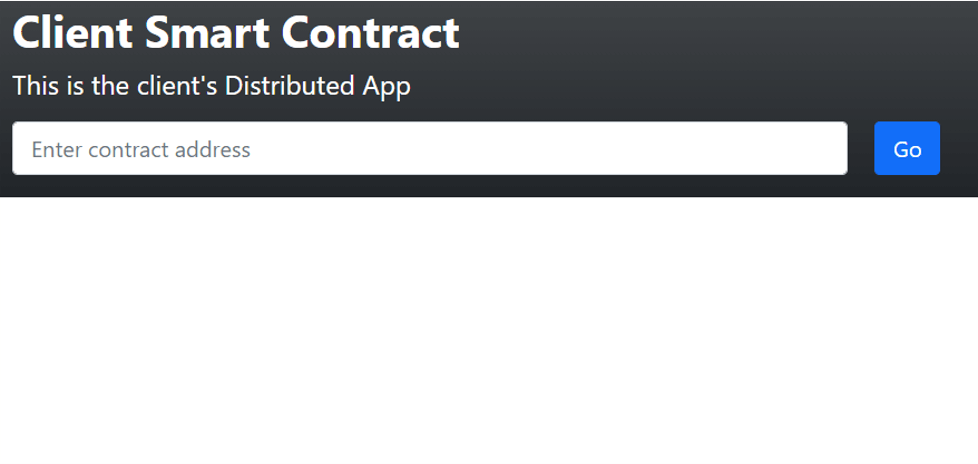
There are 2 separate user interfaces for the Freelancer's Decentralized App, namely the Freelancer's DApp and the Client's DApp.
This is the Freelancer's Dapp.
And this is the Client's Dapp.
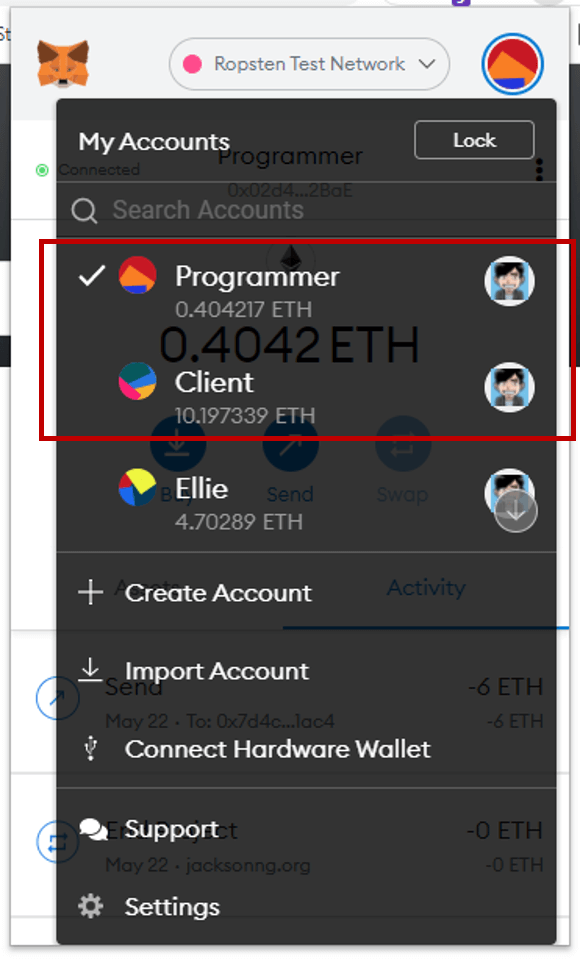
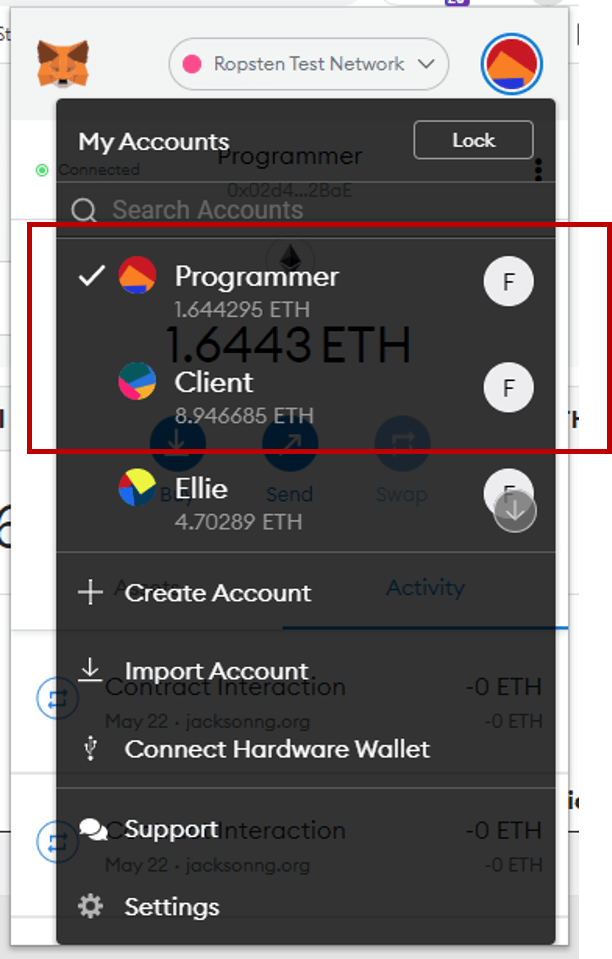
To test these DApps, create 2 accounts in your MetaMask wallet, one for the Programmer and another for the Client. Make sure that both accounts hold some ETHs so that you can simulate payments between them.
In this demonstration, the programmer and his client have agreed on a project with 3 phases as follows:
| S/N | Short Code | Description | Payment Expected |
|---|---|---|---|
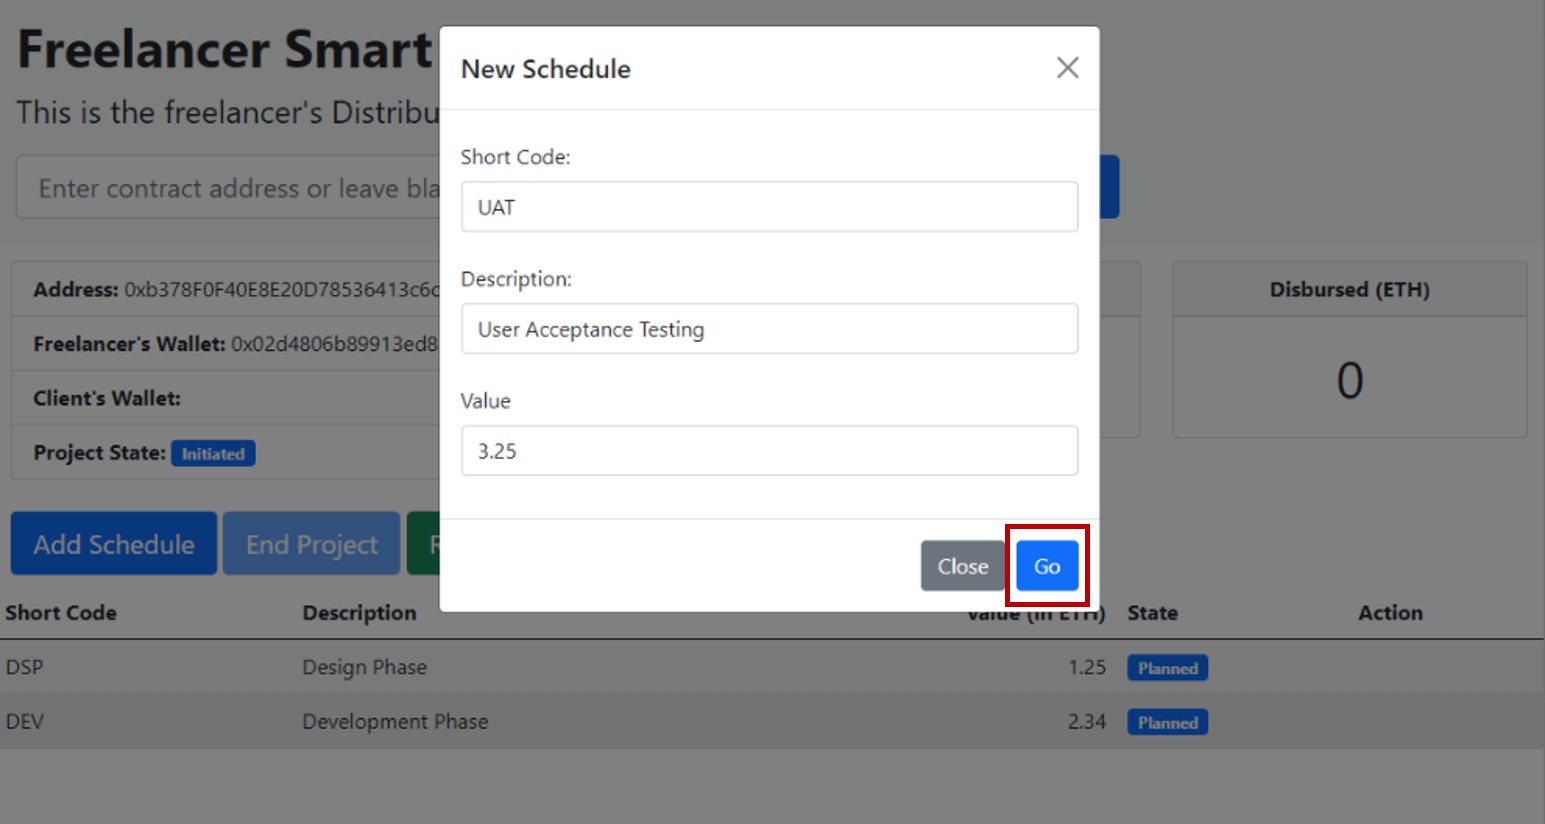
| 1 | DSP | Design Phase | 1.25 ETH |
| 2 | DEV | Development Phase | 2.34 ETH |
| 3 | UAT | User Acceptance Testing | 3.25 ETH |
Initializing the Freelancer Smart Contract
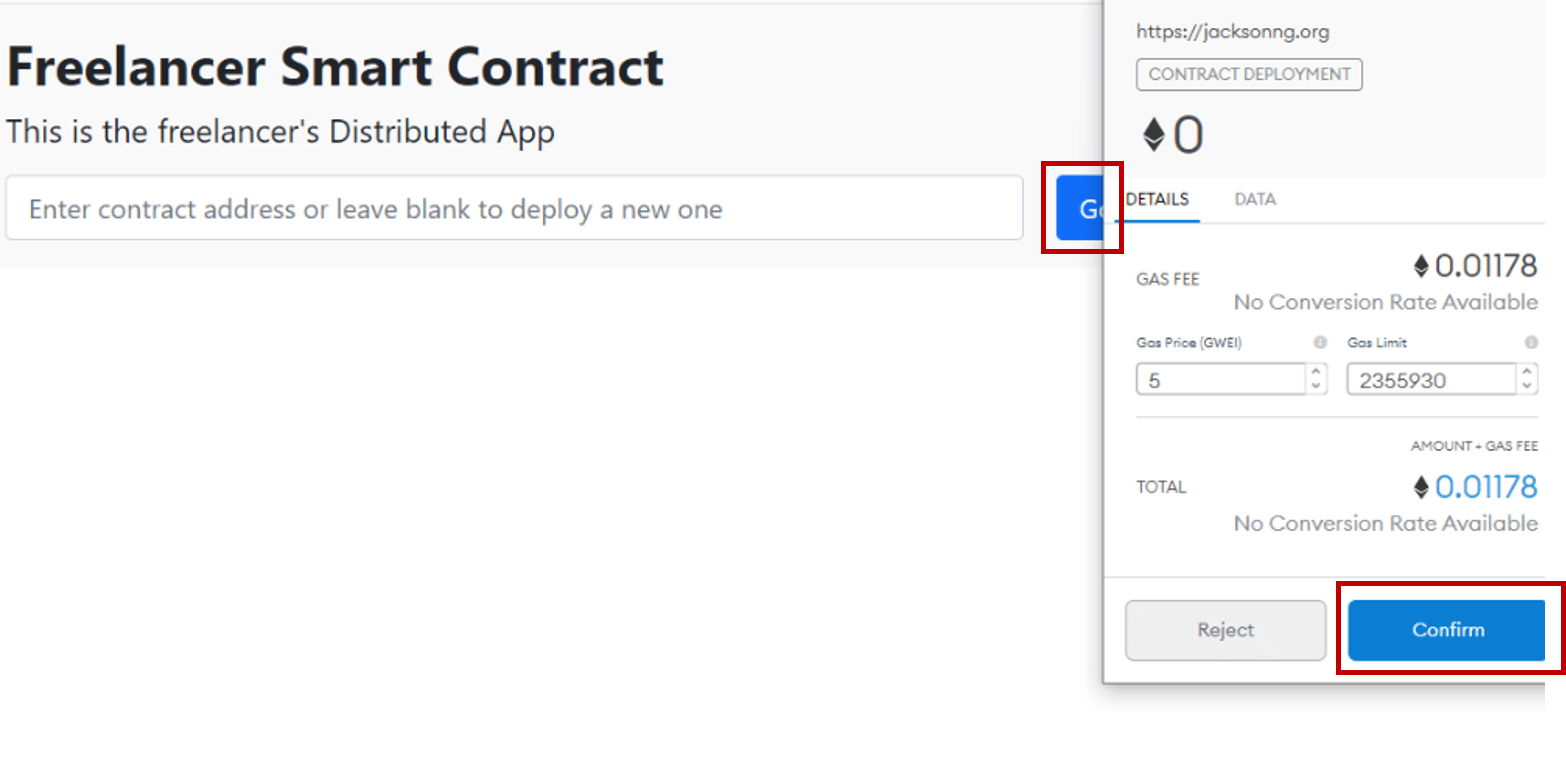
The freelancer initiates the contract by clicking [Go] at the Freelancer's Dapp. He confirms the transaction on his MetaMask Wallet.
Ensure that you have switched to the Freelancer's MetaMask wallet account before executing this step.
The Freelancer then adds the "Design Phase" schedule to the Smart Contract by clicking [Add Schedule].
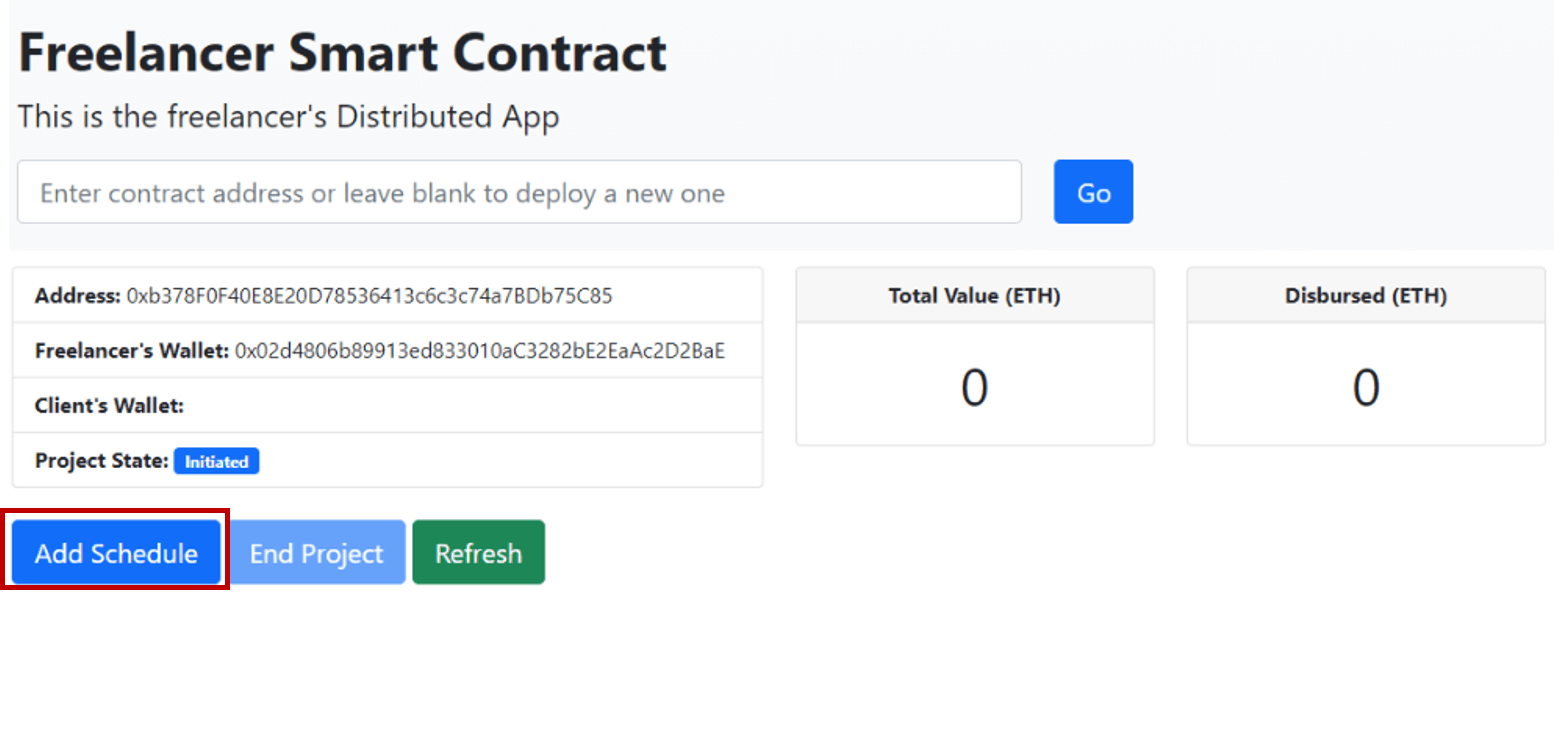
He confirms the schedule by clicking [Go].
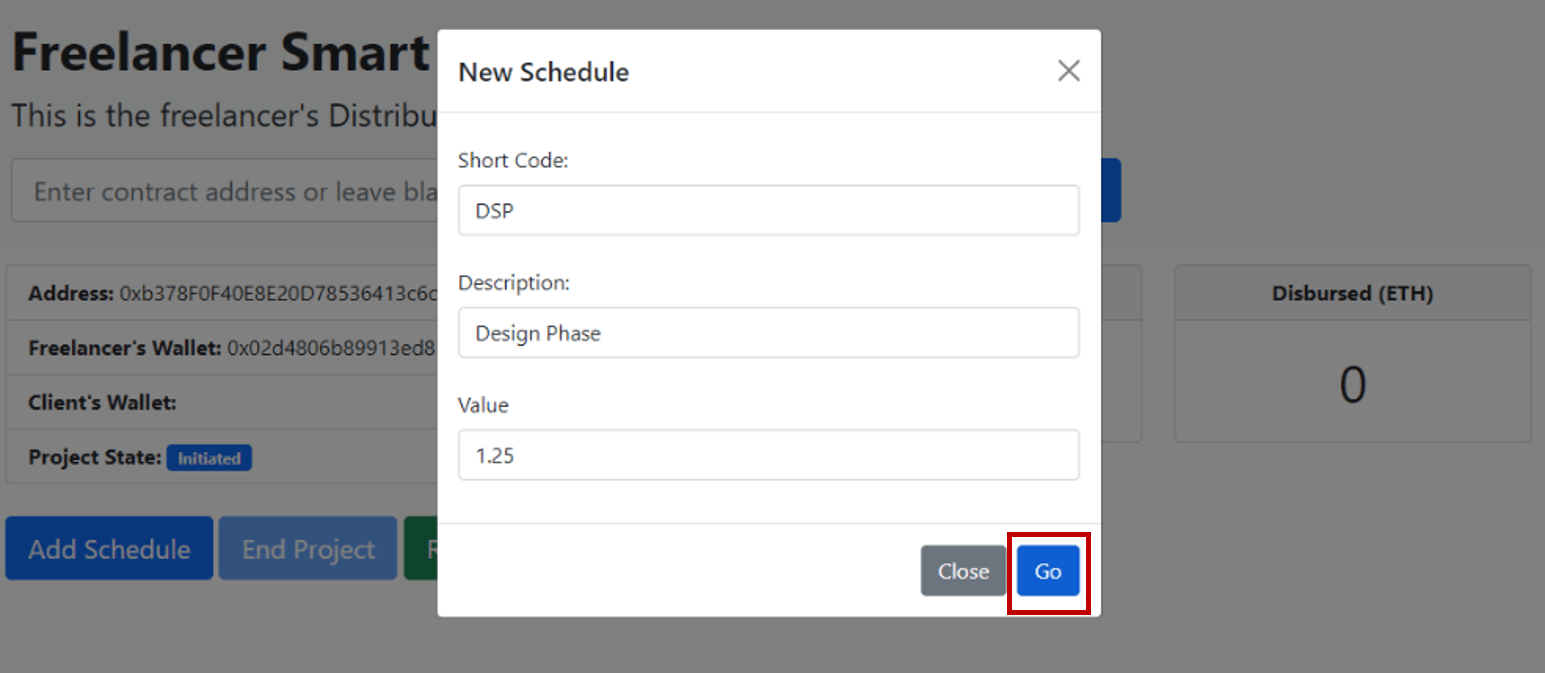
He repeats this step for the "Development Phase".

Followed by "User Acceptance Testing".
After the schedules are added in the Freelancer's Smart Contract, the freelancer may inform the client to approve it.
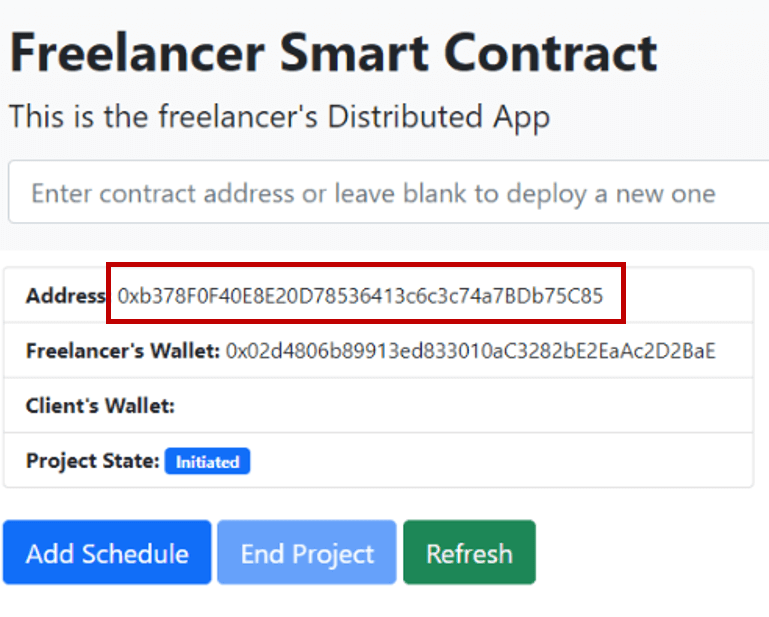
He copies the address of the Freelancer's Smart Contract and gives it to the Client. This may be done via email, private message, or any other communication means that both client and programmer have agreed on.
Accepting & Funding Freelancer Smart Contract
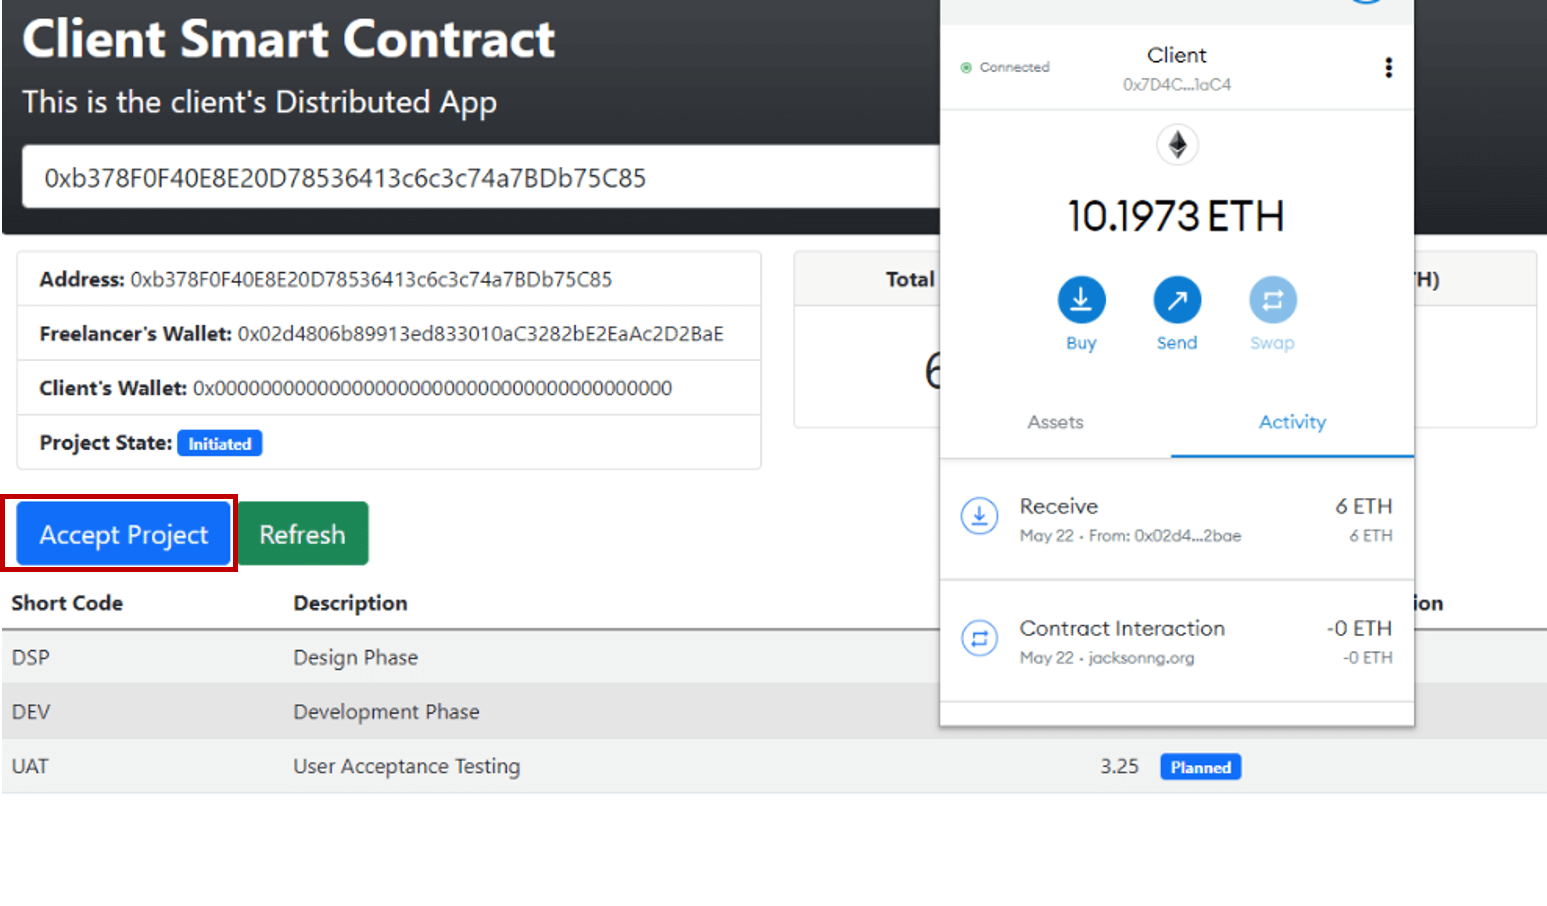
Using the Client's DApp, the client pastes the address provided by the freelancer and clicks [Go] to retrieve the Freelancer's Smart Contract.
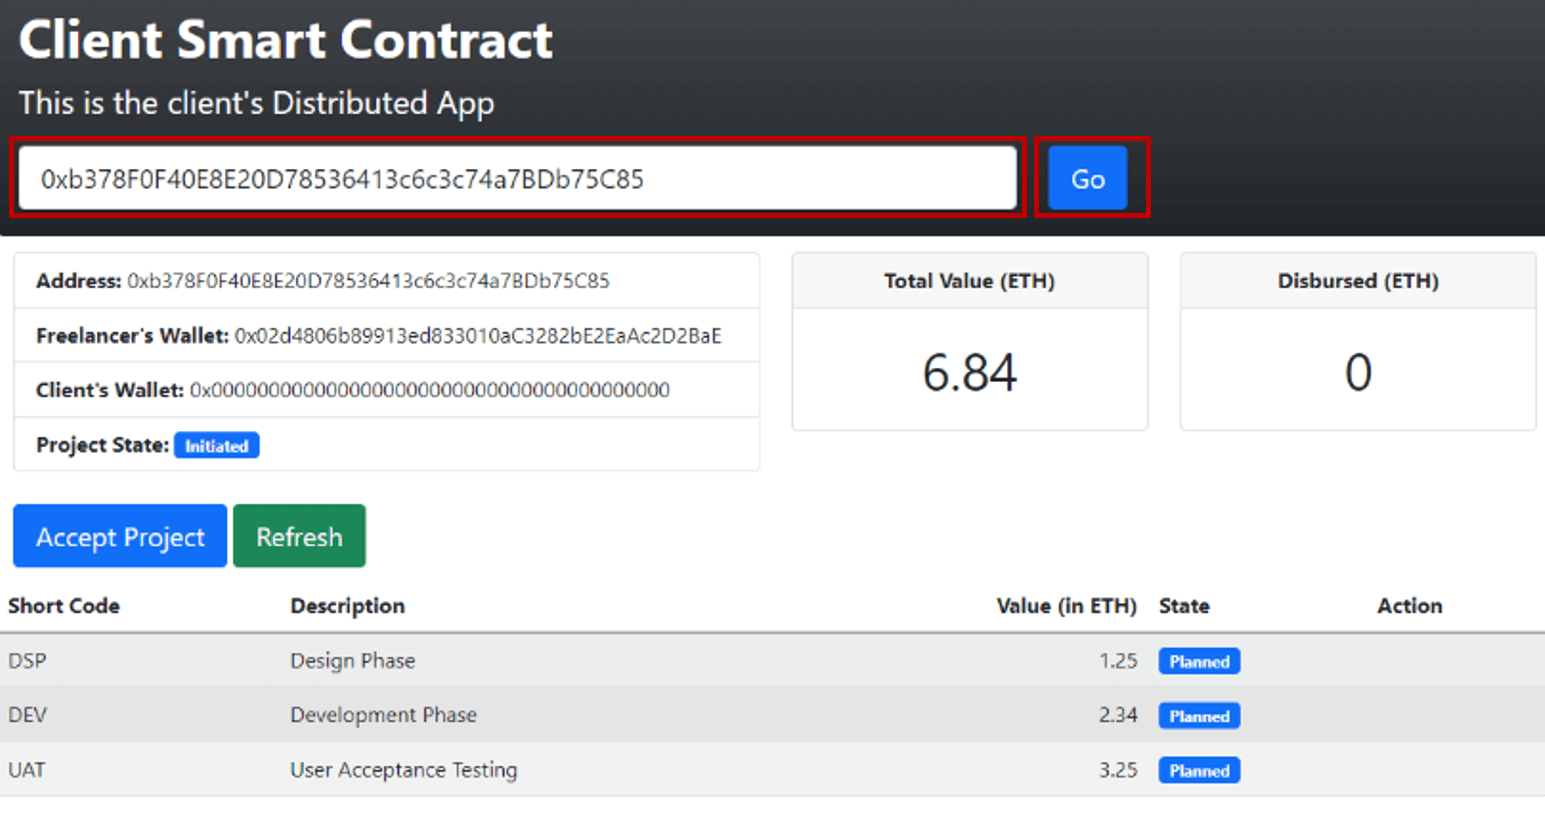
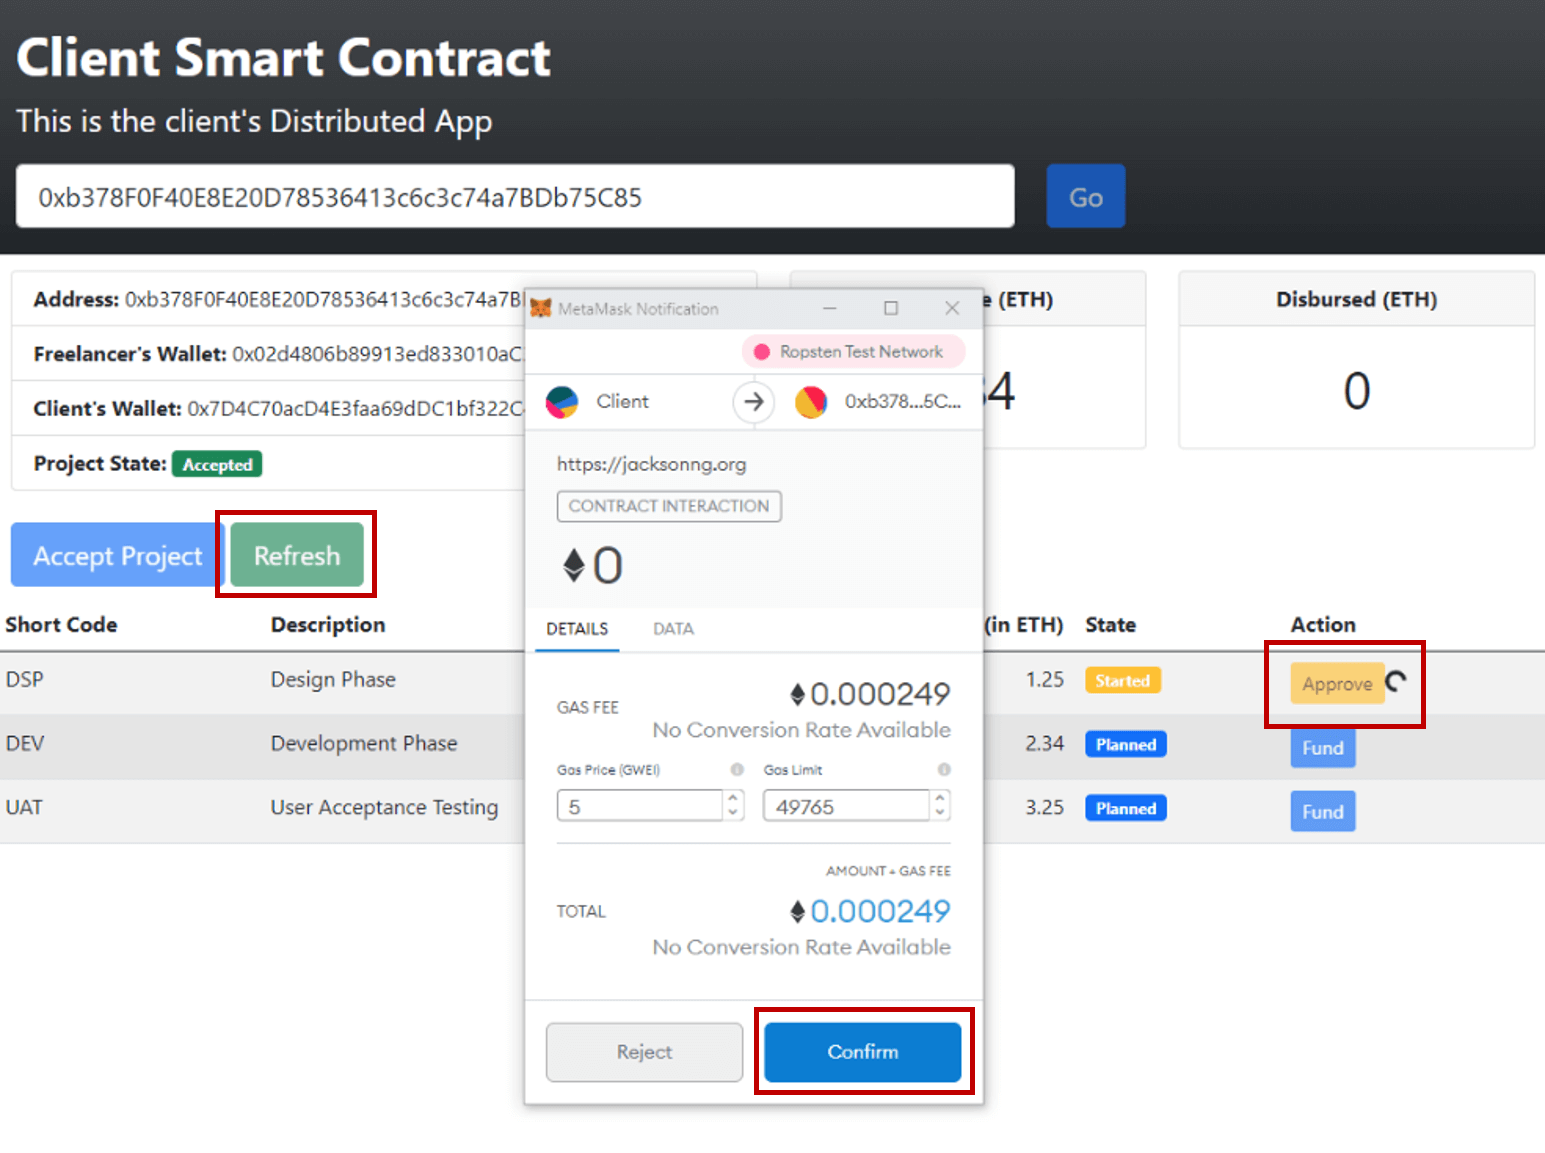
He studies payment schedules and then accepts the project. He clicks [Accept Project].
Before you execute this step of the process, ensure that you have changed your MetaMask account to the client's wallet.
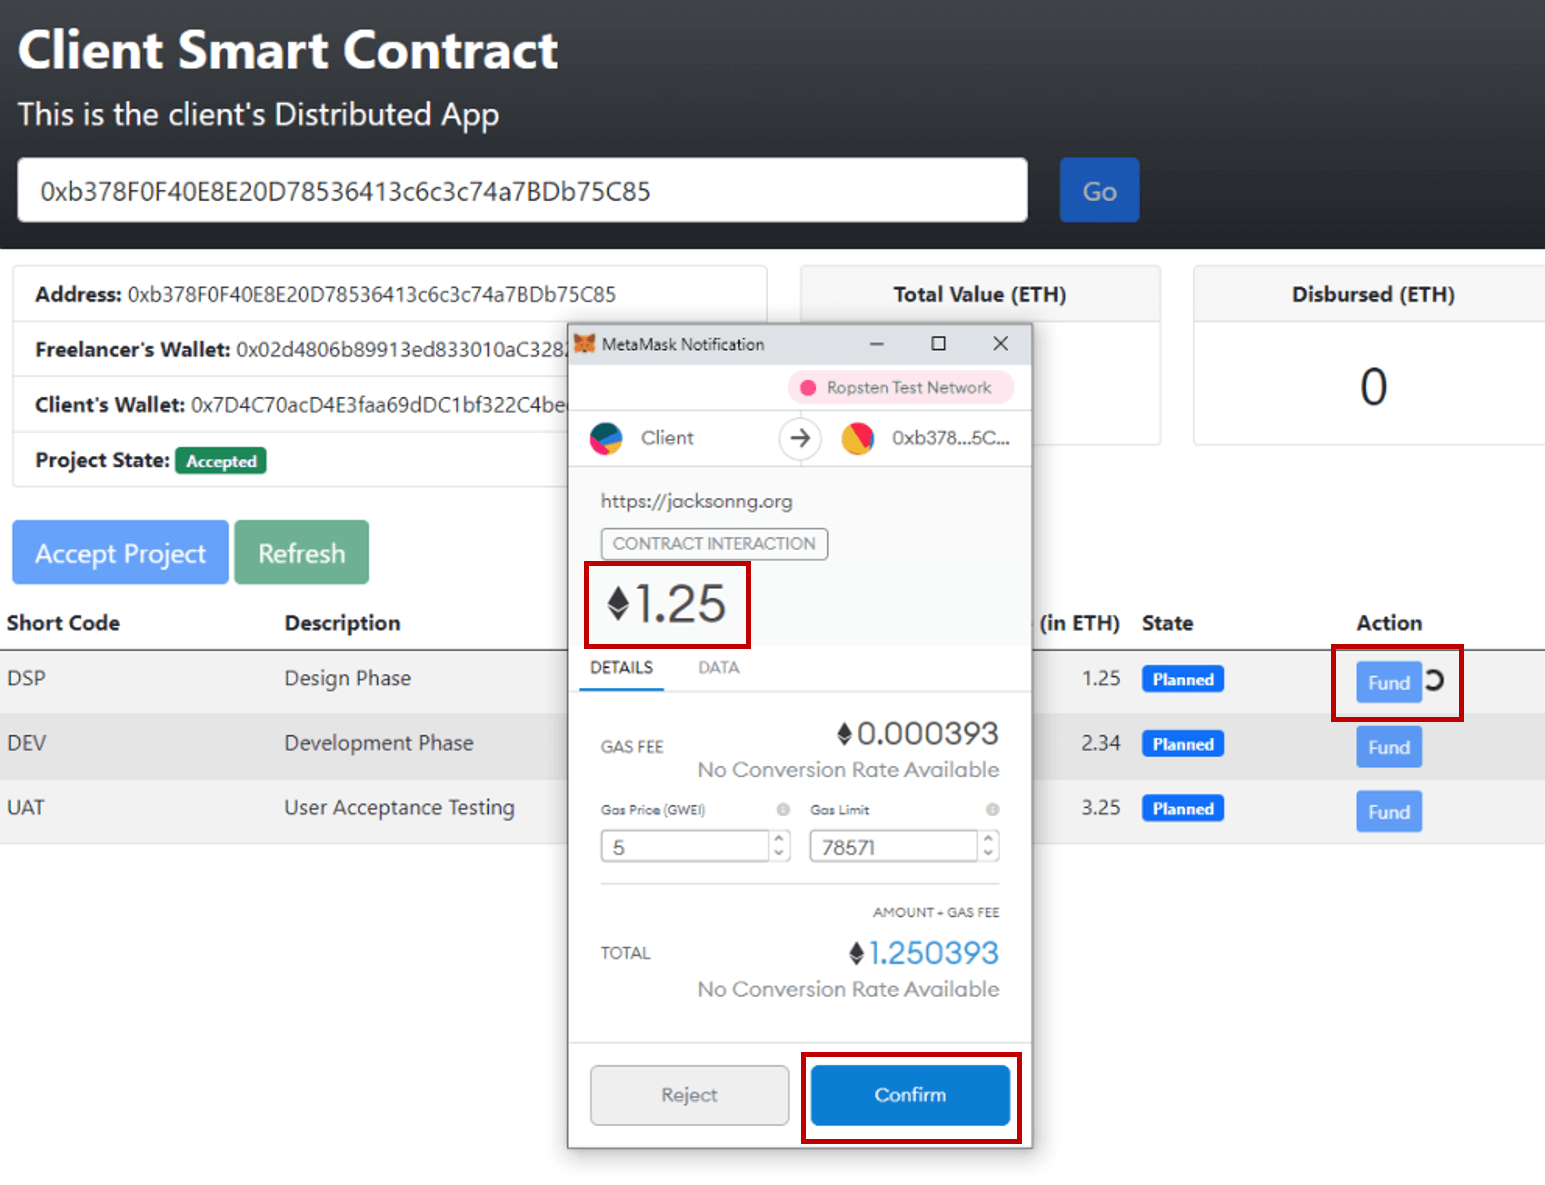
The client then clicks [Fund] on the "Design Phase" schedule. By confirming this transaction 1.25 ETH will be deducted from the client's schedule and added to the Freelancer's Smart Contract.
Although 1.25 ETH has been deducted from the client's wallet at this stage, the programmer does not receive the funds immediately. At this stage, funds are parked in the Freelancer's Smart Contract.
Completing Work and Receiving Payment
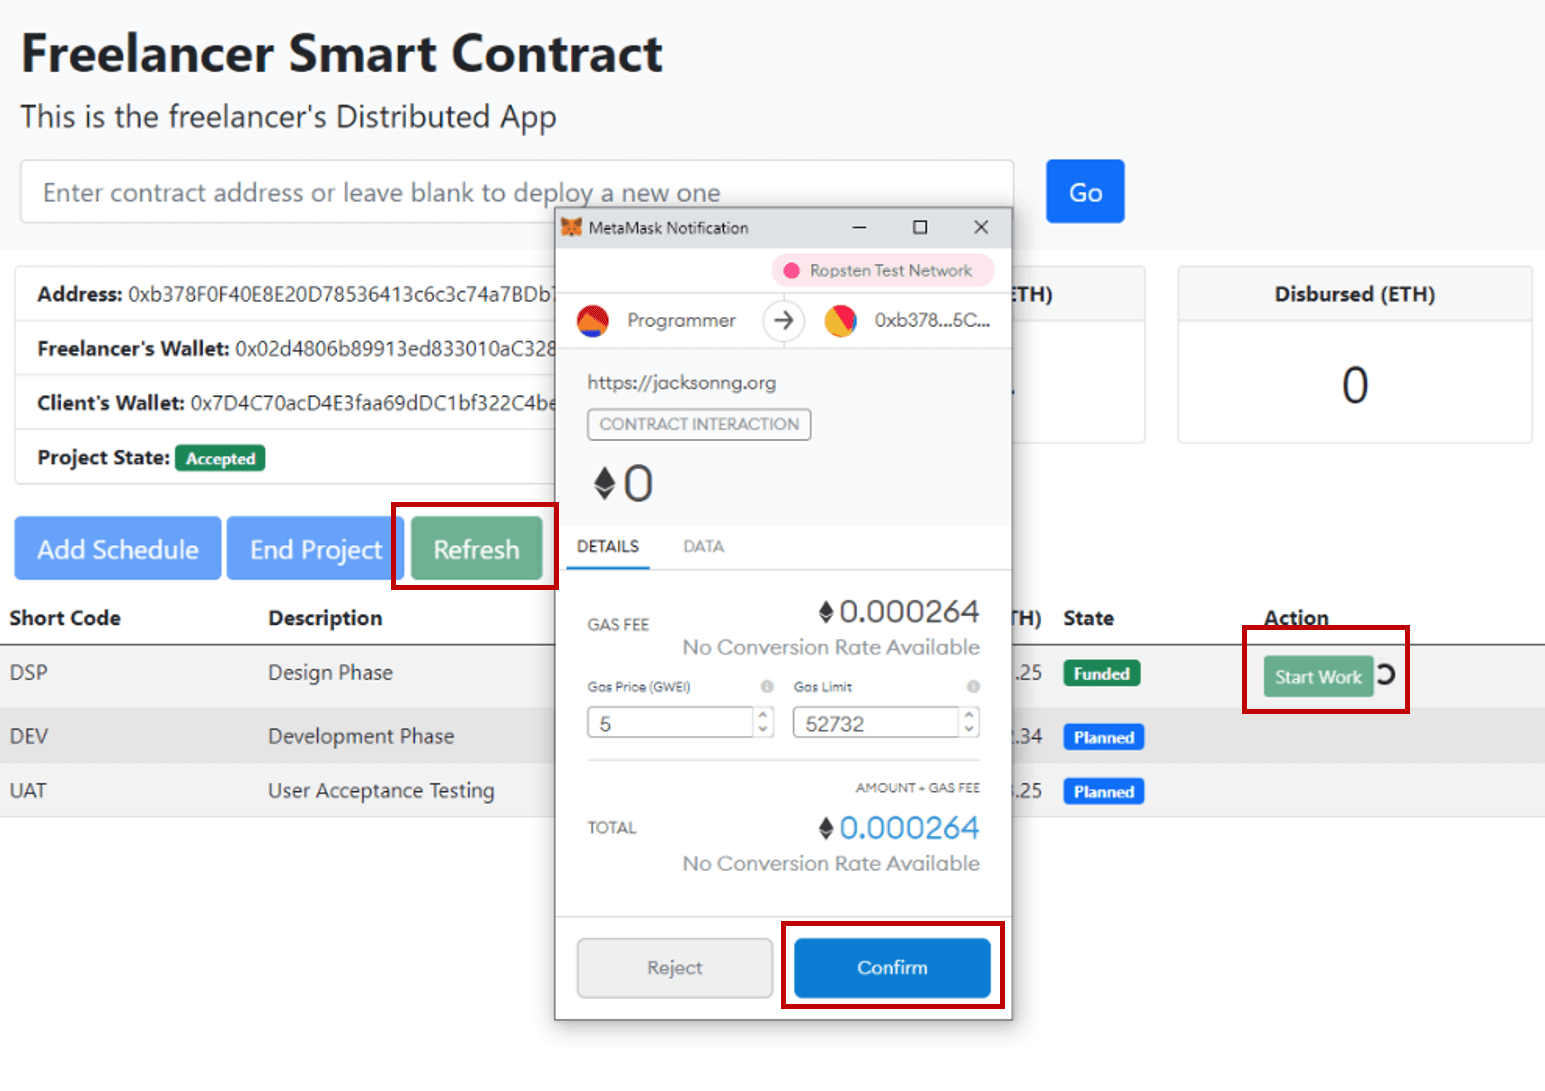
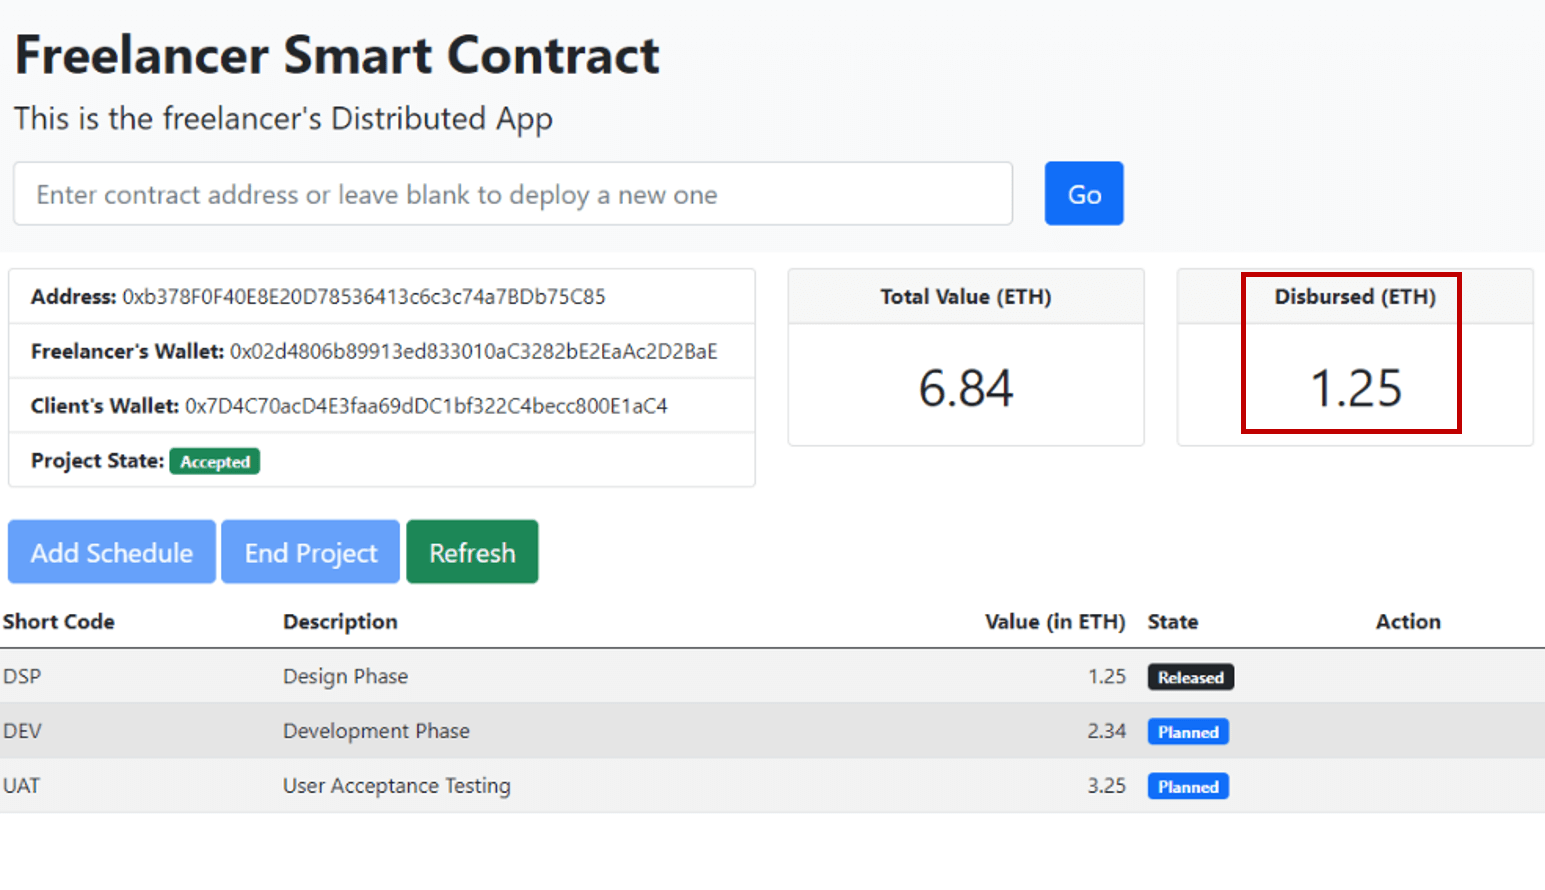
The programmer clicks [Refresh] at the Freelancer's DApp and notes that 1.25 ETH has been paid into the "Design Phase" schedule. Having been assured that funds are now parked in the Freelancer's Smart Contract, the programmer should feel safe to start work.
He clicks [Start Work] and begins working on this phase of the project.
Before you execute this step of the process, ensure that you have changed your MetaMask account to the programmer's wallet.
When the programmer has completed work for this phase, he notifies the client.
The client clicks [Refresh] at the Client's DApp, followed by [Approve] at the "Design Phase" schedule to approve the work that the programmer has done for this phase of the project.
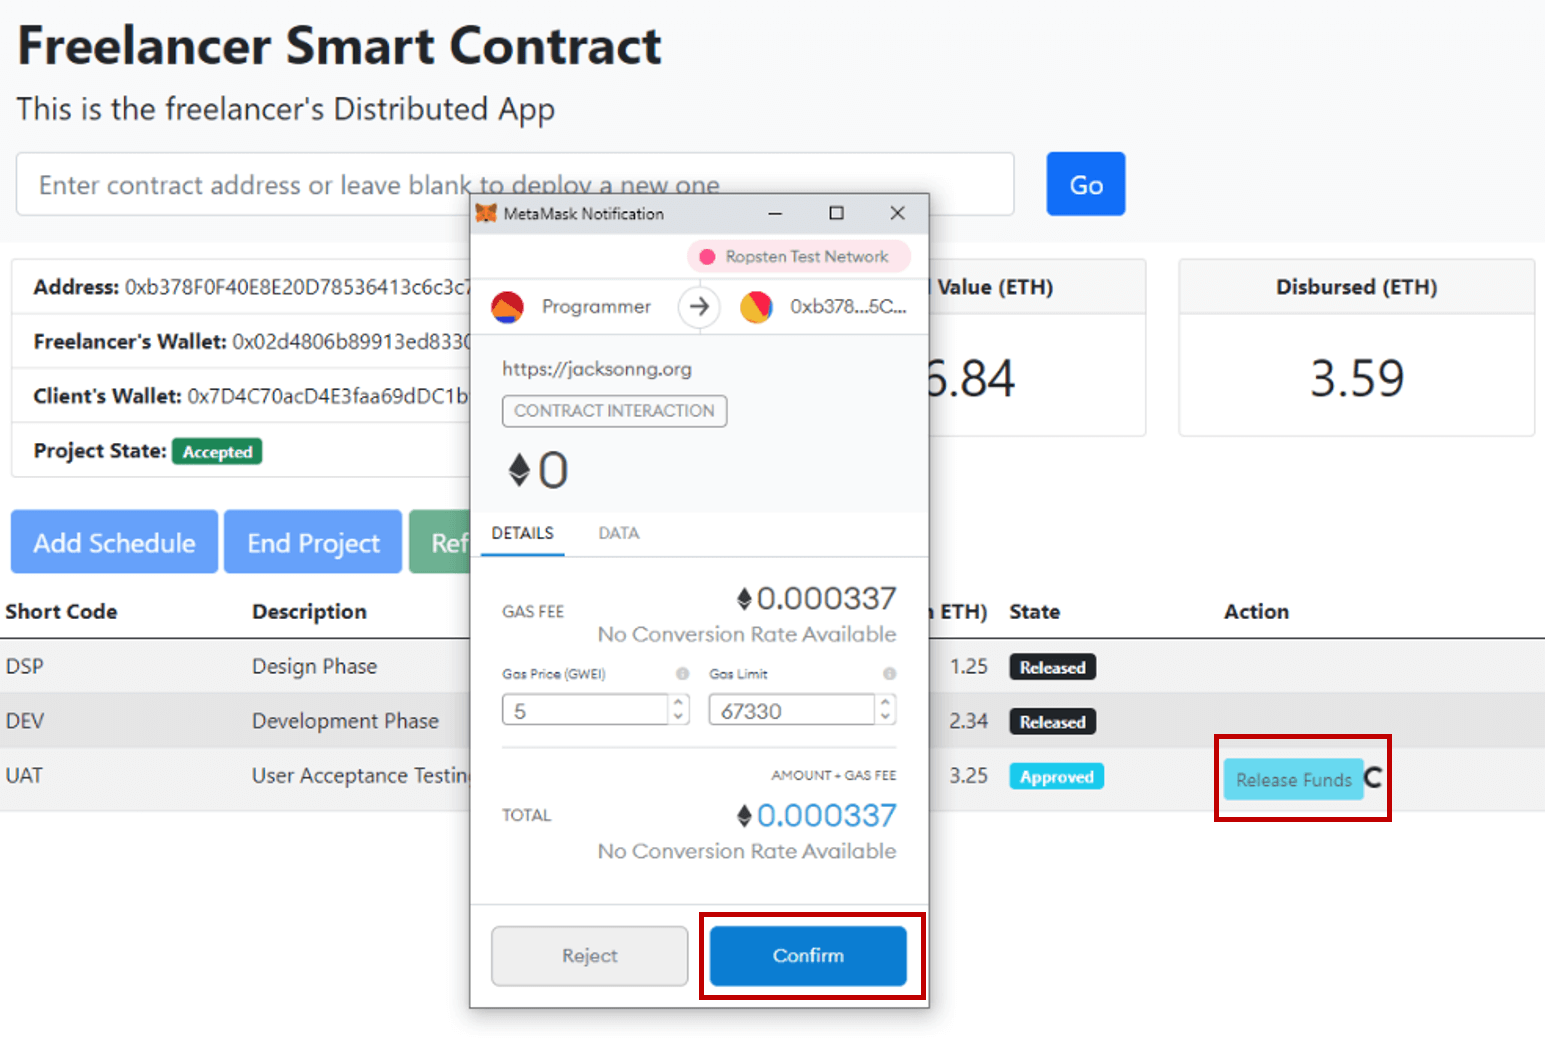
By approving the work done for this phase, the Freelancer's Smart Contract will allow the programmer to release 1.25 ETH from the Freelancer's Smart Contract to his wallet.
The programmer refreshes the Freelancer's DApp. He then clicks [Release Funds] to initiate a fund transfer of 1.25 ETH from the Freelancer's Smart Contract to his wallet account.
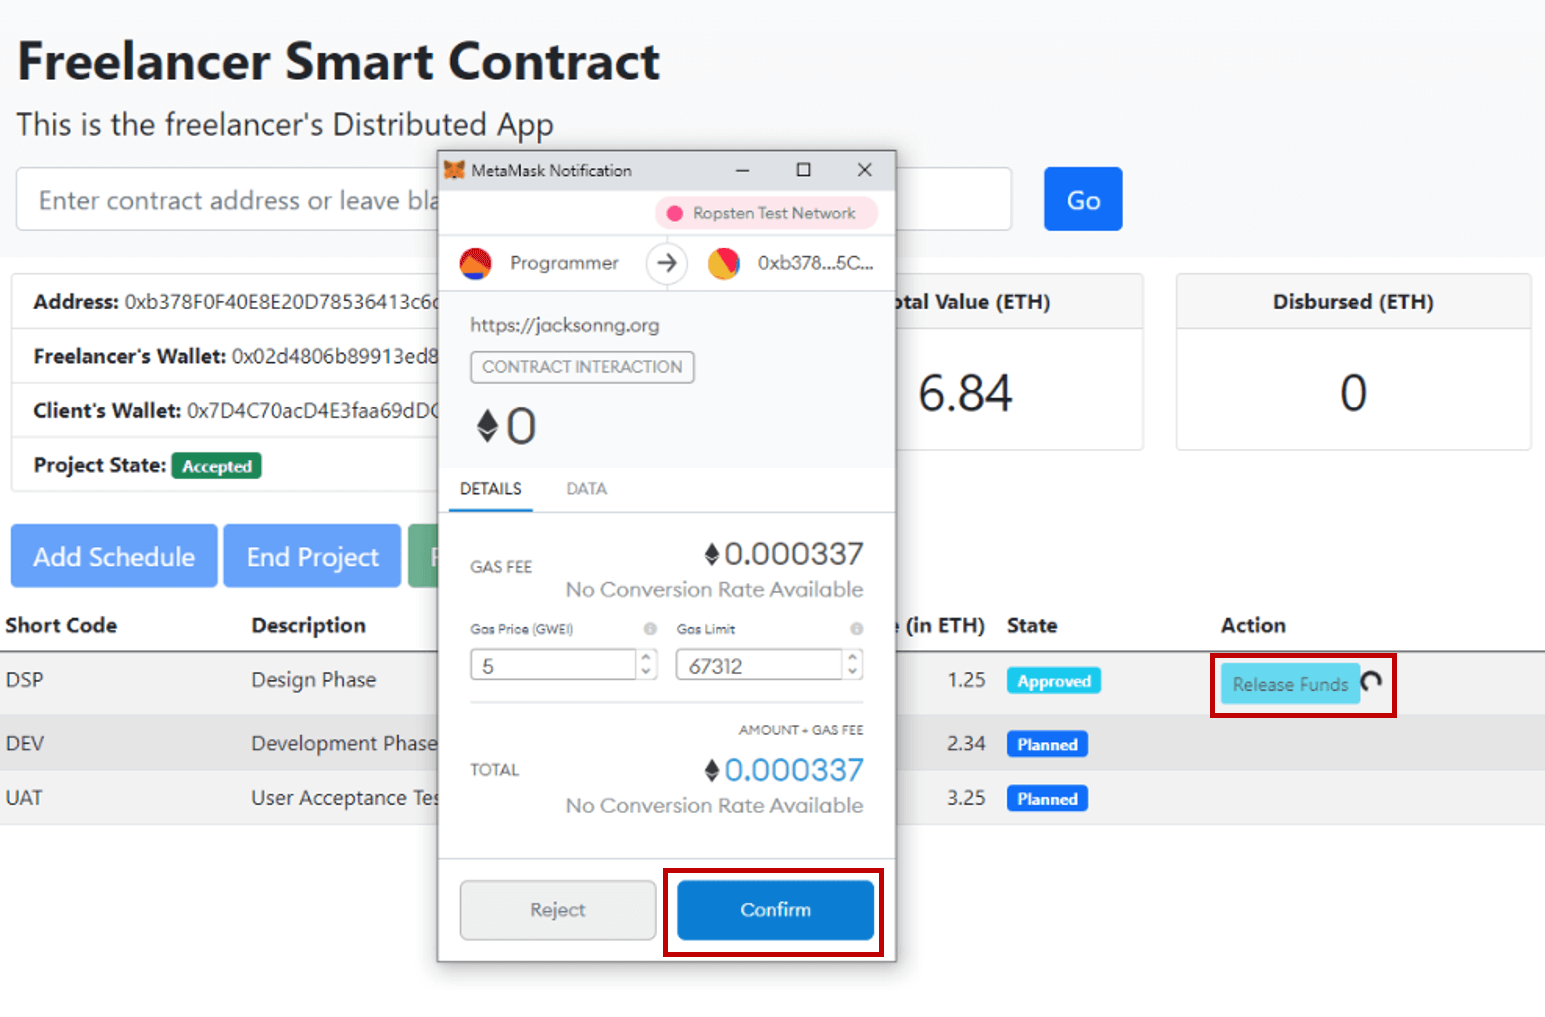
The Smart Contract transfers 1.25 ETH to the Programmer's wallet.
Both the programmer and the client may observe from their respective Freelancer's DApp and Client's DApp that 1.25 ETH has been disbursed.
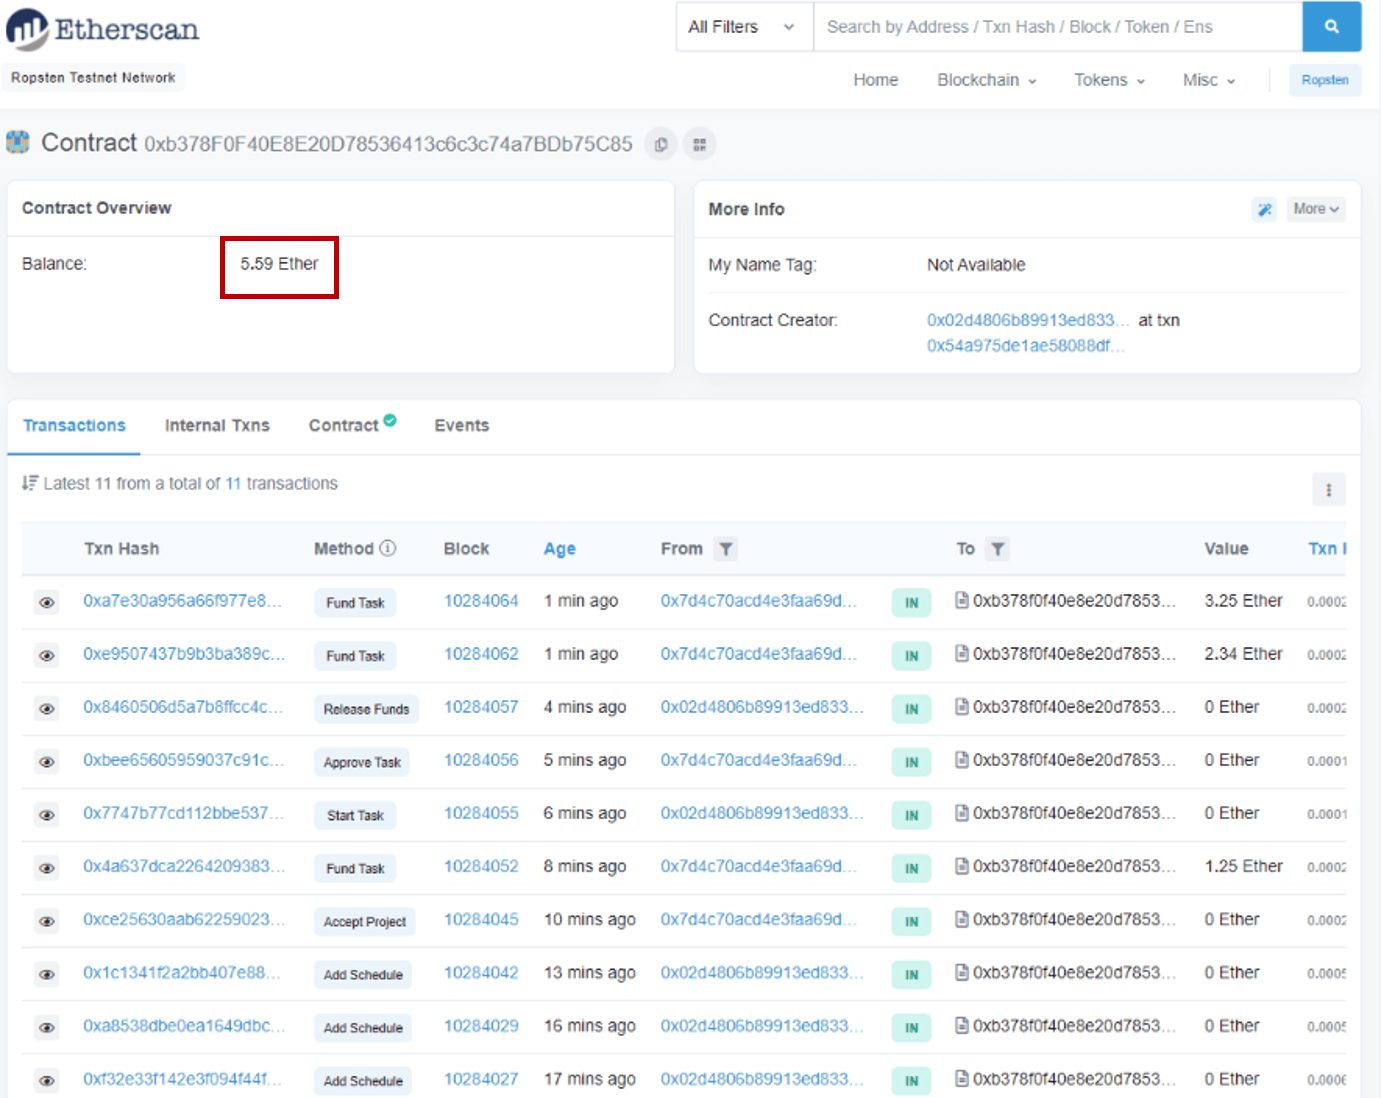
At any point in the process, the programmer and the client may view the transactions and balance that the Freelancer Smart Contract holds by entering the Smart Contract's address at a Blockchain Explorer such as Etherscan.
Here's an example.
Repeat the steps for Funding, Starting Work, Approving Work, and Releasing Funds for "Development Phase" and "User Acceptance Testing".
As the phases in the project are completed, the ETHs are transferred from the Freelancer's Smart Contract to the Programmer's wallet.

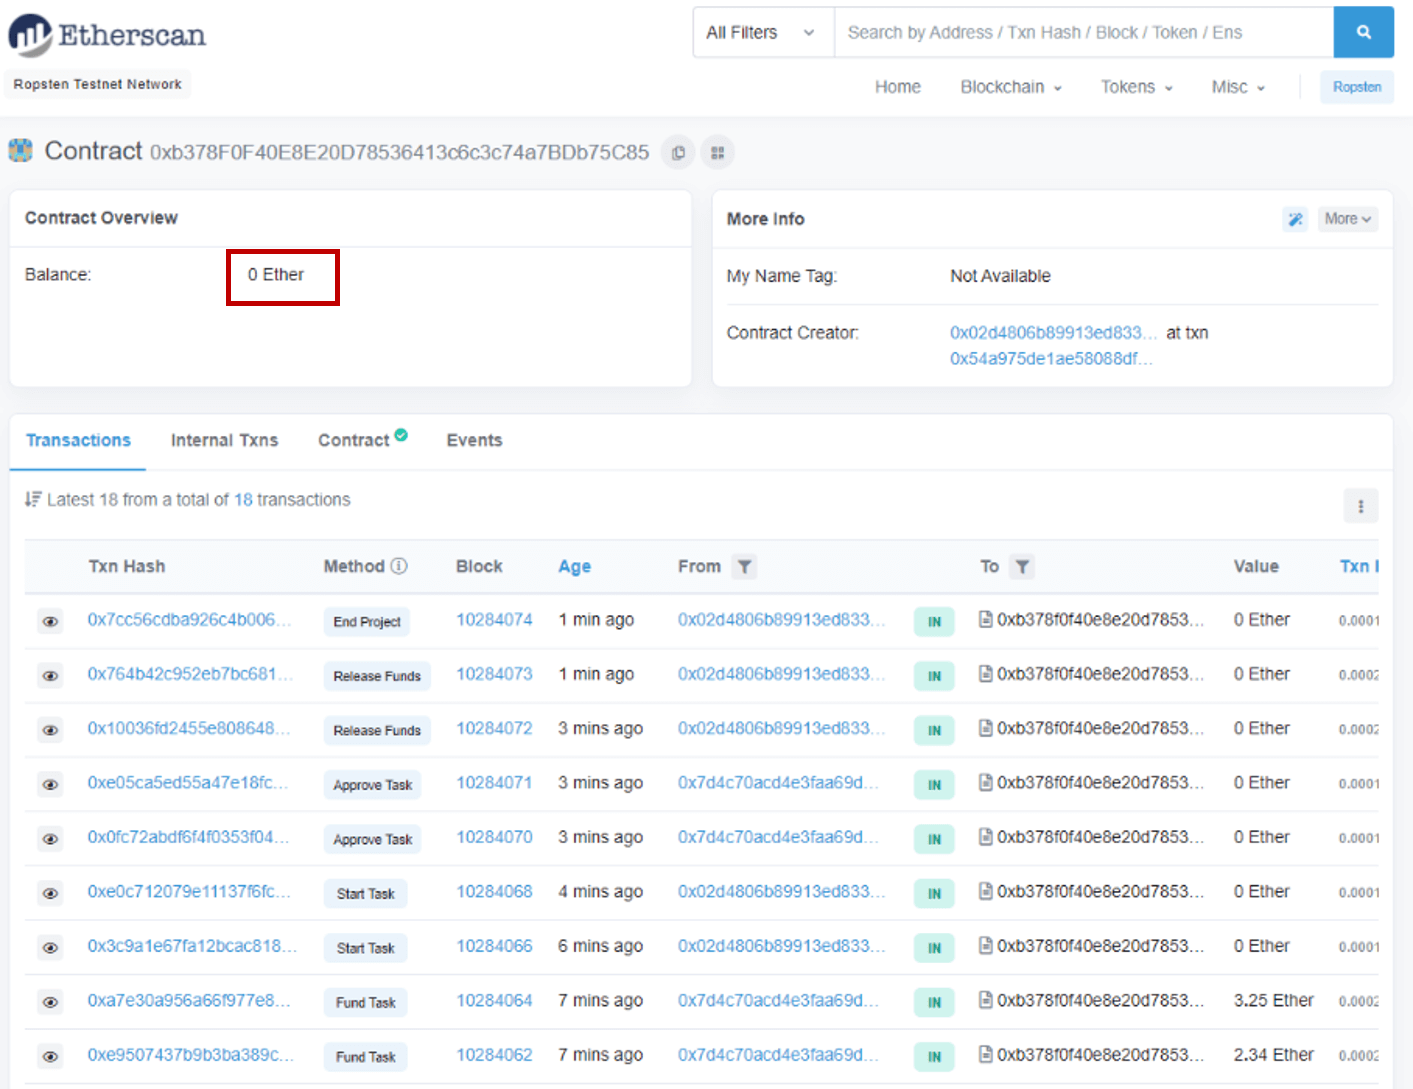
When the final task in the schedule is done, the programmer may click [End Project] to conclude this project.

At this stage, the Freelancer's Smart Contract would have had its balance cleared to 0 ETH. The project is now complete.
Summary
This process allows a programmer and his client to arrange payments for a multi-phase project. It ensures that both parties fulfill their respective obligations. The mechanisms of the Smart Contract have been explained in detail in Part 1.
This table reiterates how the Freelancer's Smart Contract solves typical challenges in project payments:
| Case | How the Smart Contract Handles |
|---|---|
|
|
|
|
|
|
|
|
|
|
What's Next?
The source codes for this project can be found in my Github repository.
I will deep dive into the codes behind the Freelancer's Solidity Smart Contract in the next part of this series.
- The Freelancer's Smart Contract: How It Works
- The Freelancer's Smart Contract: DApp Demo
- The Freelancer's Smart Contract: Solidity Codes Explained
- The Freelancer's Smart Contract: DApp Codes Explained
In the next part of this tutorial, I will explain the Solidity codes behind the Freelancer's Smart Contract. Stay tuned!
If you enjoyed this tutorial, perhaps you may also wish to read:
- Ropsten Ethereum Faucet: I built an Ethereum faucet to give out ETH on the Ropsten network.
- Voting on a Blockchain: An implementation of a Voting DApp on Ethereum.
- Deploy a Private Ethereum Blockchain in 10 Minutes with Kaleido: Getting a private Ethereum Blockchain up and running in a jiffy.
- Smart Contract Explained by Demonstration: A demo of an Escrow Service Smart Contract DApp - in my opinion, the fastest way to explain to a layperson what Blockchain is.
- Ethereum IOT Kid Grounding Device: My attempt to incorporate Blockchain with the Internet of Things.
- Lottery as a Smart Contract: Decentralized Lottery, an attempt to build a lottery system on the Ethereum Blockchain.
Photo by Cathryn Lavery on Unsplash
