

Introducing the Ethereum Development Environment: Part 1
My Ethereum Development Toolchain
Like all other software development processes, building Decentralized Applications in Ethereum comes with its suite of development tools. In fact, there are many options.
In this 2-part tutorial I will walk through my Ethereum Development toolchain using the example of building the Freelancer Decentralized Application:
- Writing and Testing the Solidity Smart Contract
- Building and Deploying the DApp
The scripts and config files that I use for this tutorial can be found in my GitHub repository here
There are many ways to build a DApp, and here's mine.
Ganache
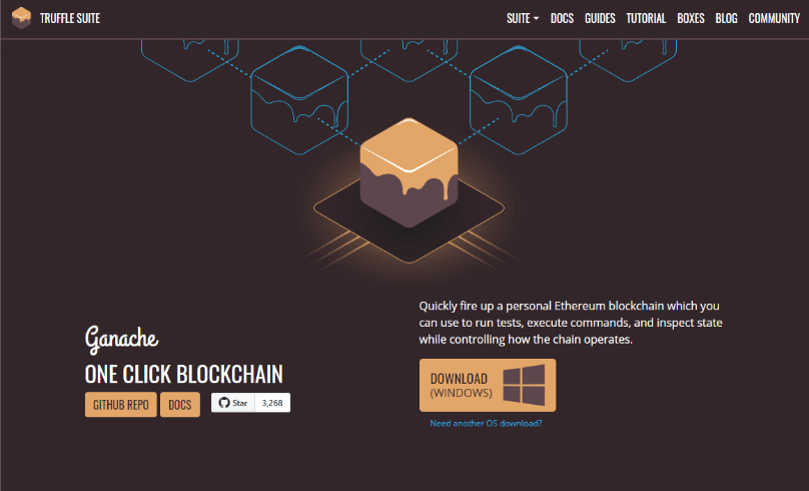
Ganache is a desktop-based personal Ethereum Blockchain. A local, self-contained Ethereum Blockchain network is the fastest way to test your codes since transactions get executed instantaneously.
Visit Ganache, download, install and fire it up on your computer.
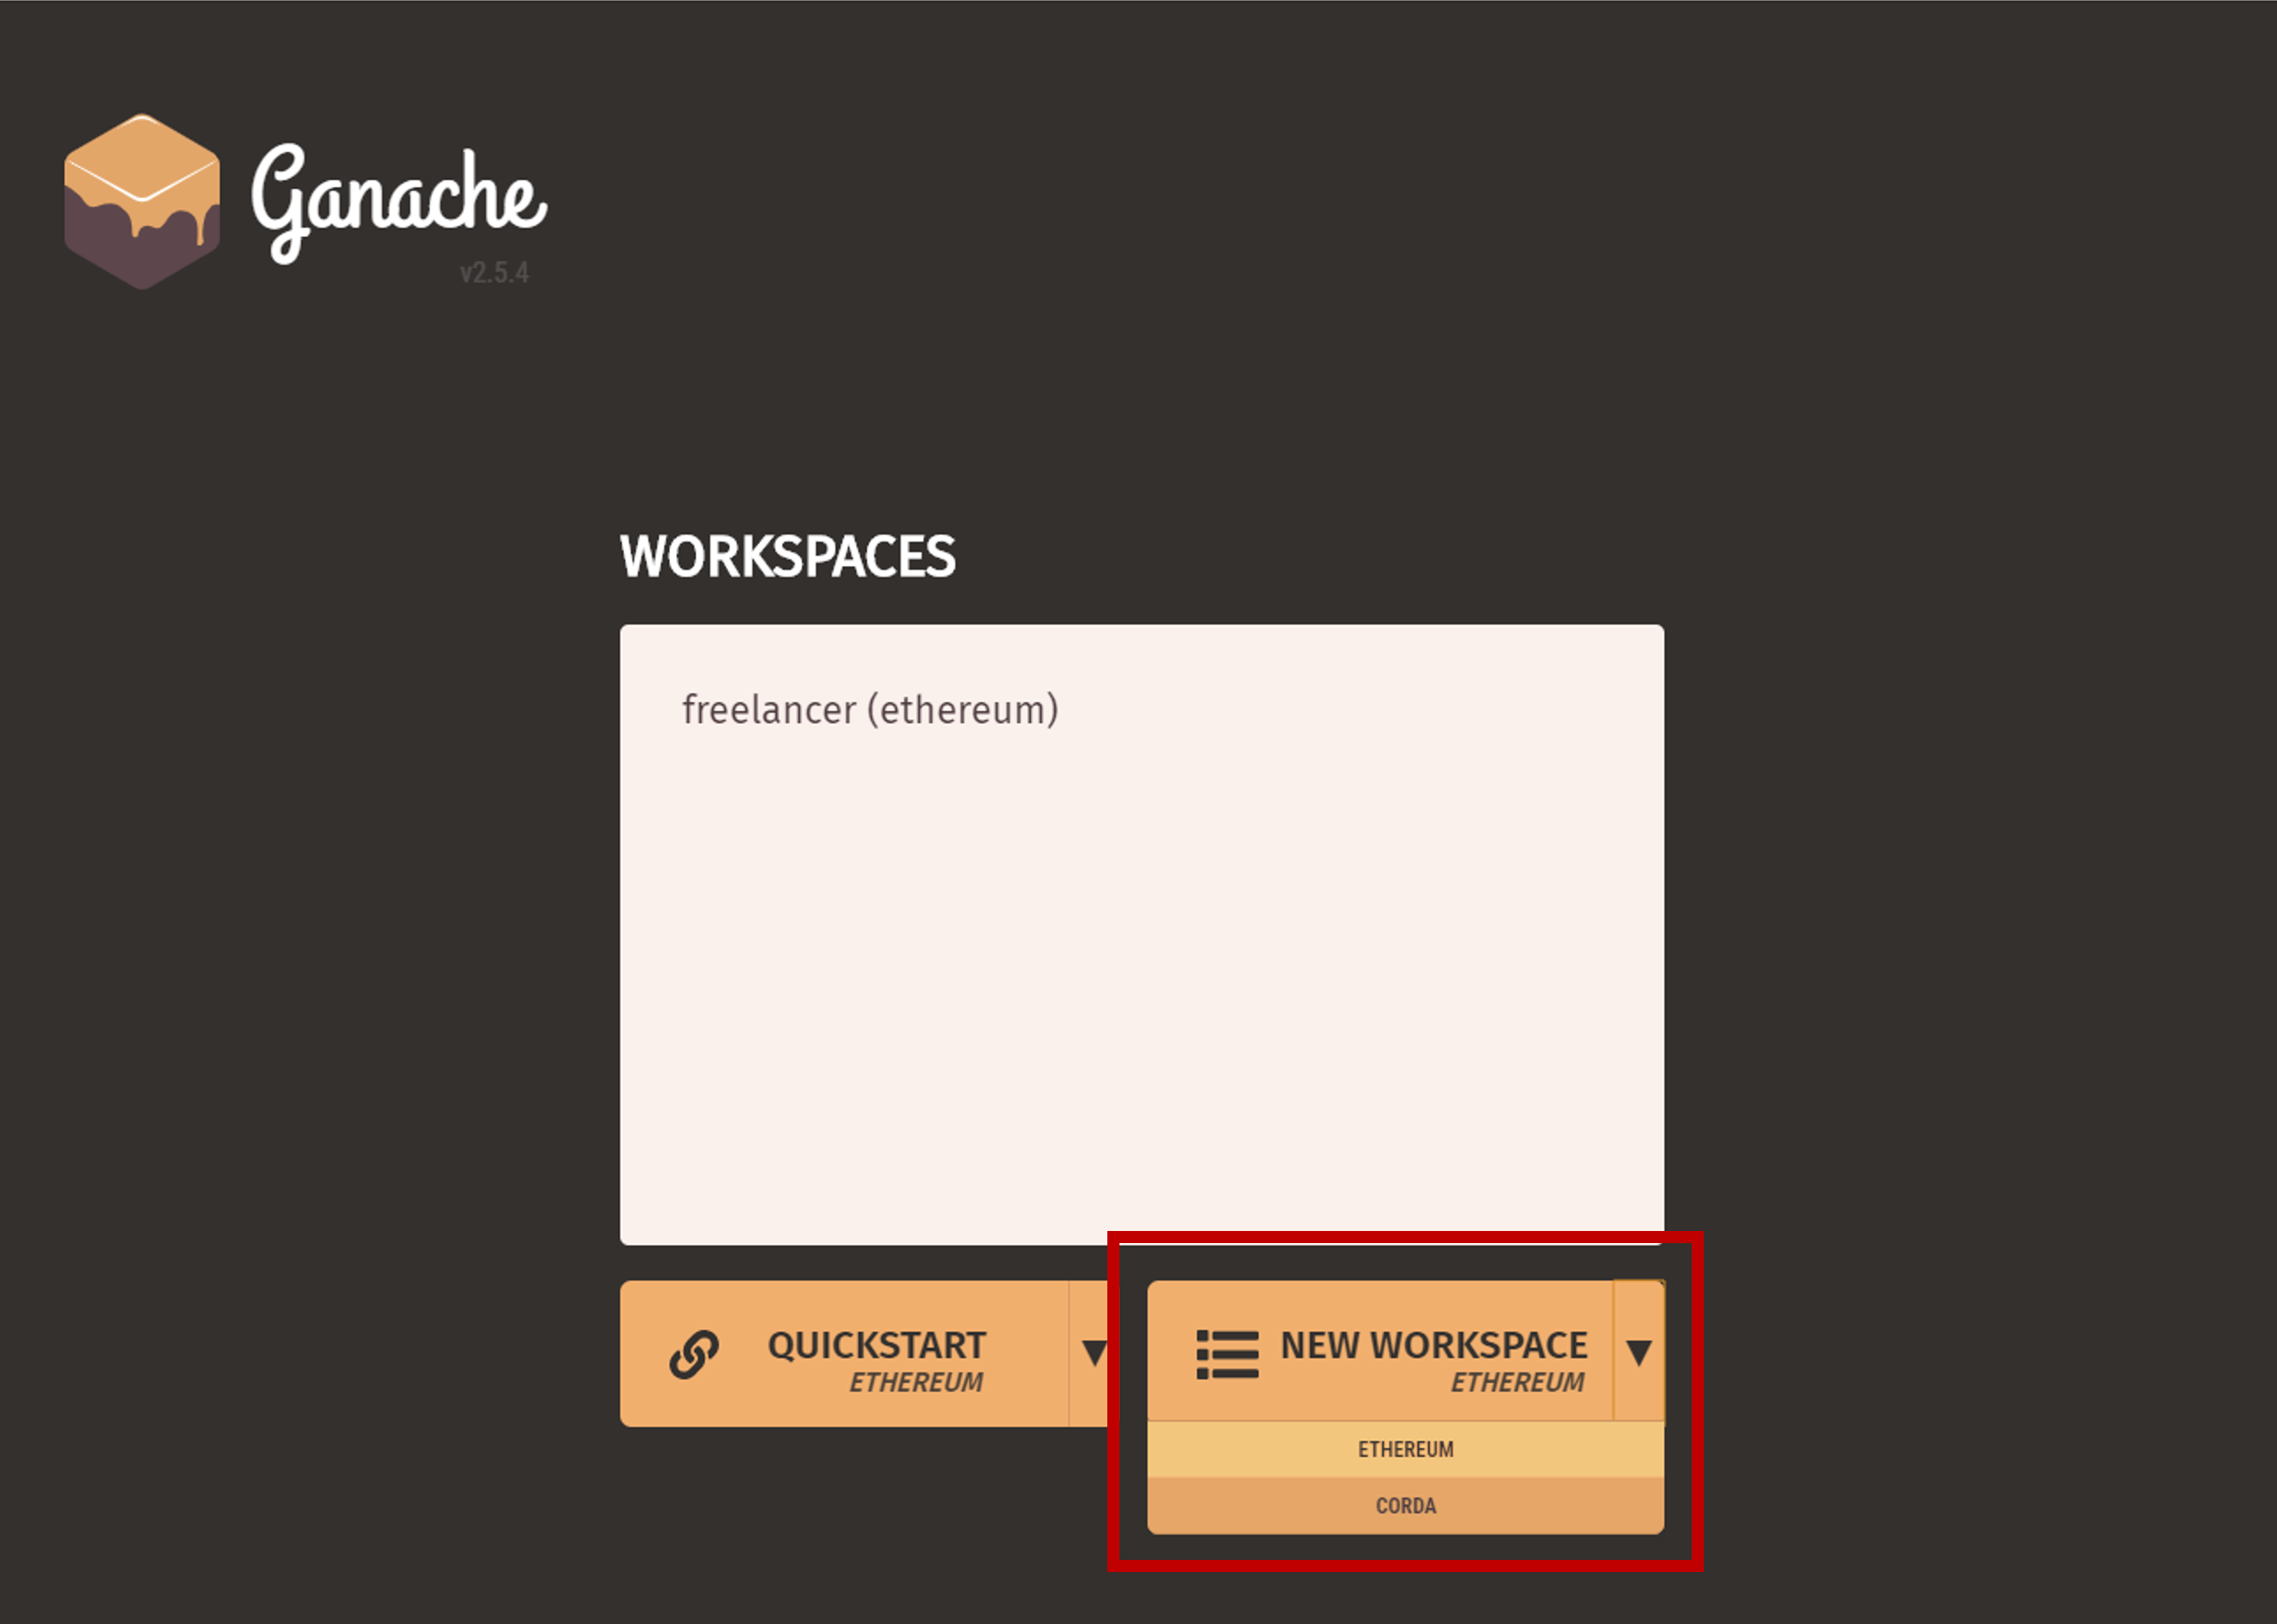
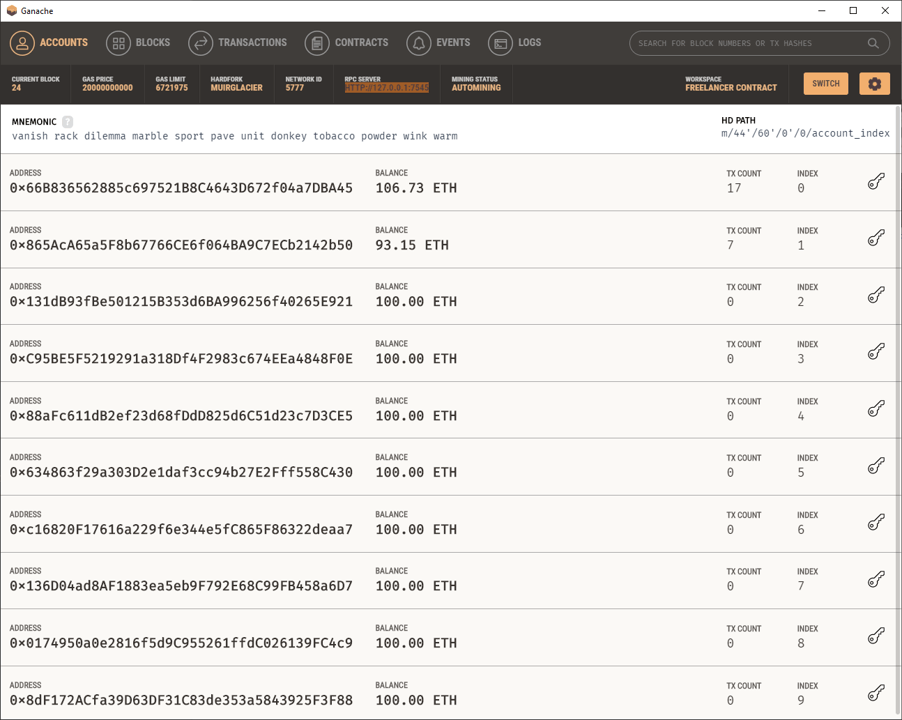
Add a new workspace. Call it "Freelancer Contract" as we will be testing our Freelancer contract in this self-contained local Ethereum Blockchain network. Save the workspace and start it up.
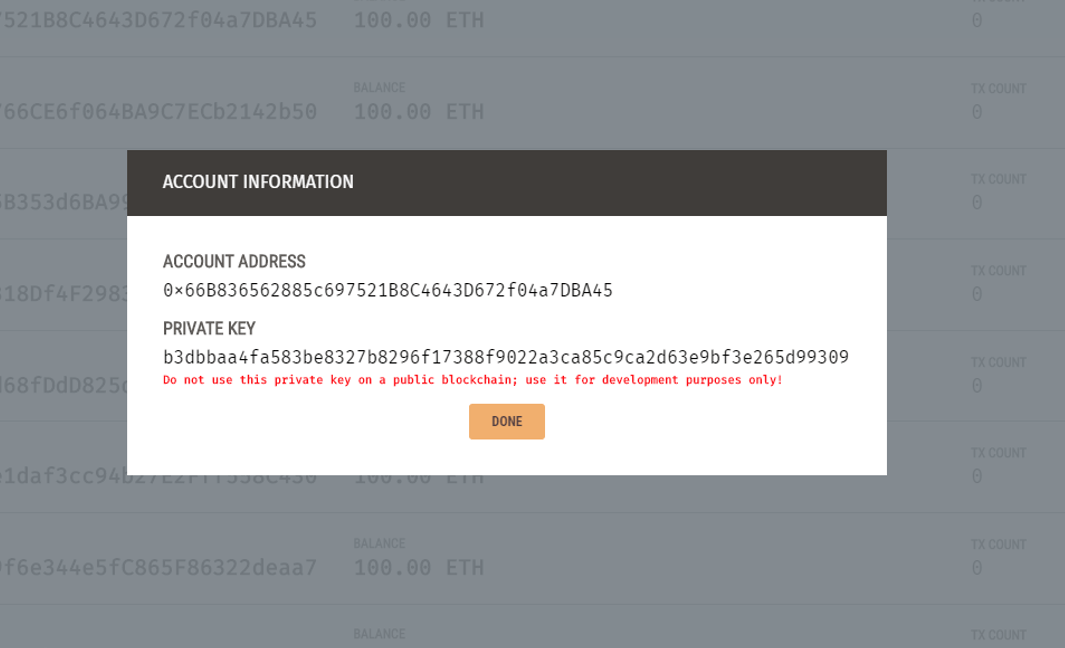
Notice that a handful of accounts, well-loaded with 100 ETH each had been generated. Click Show Keys to reveal the private key for the first account.
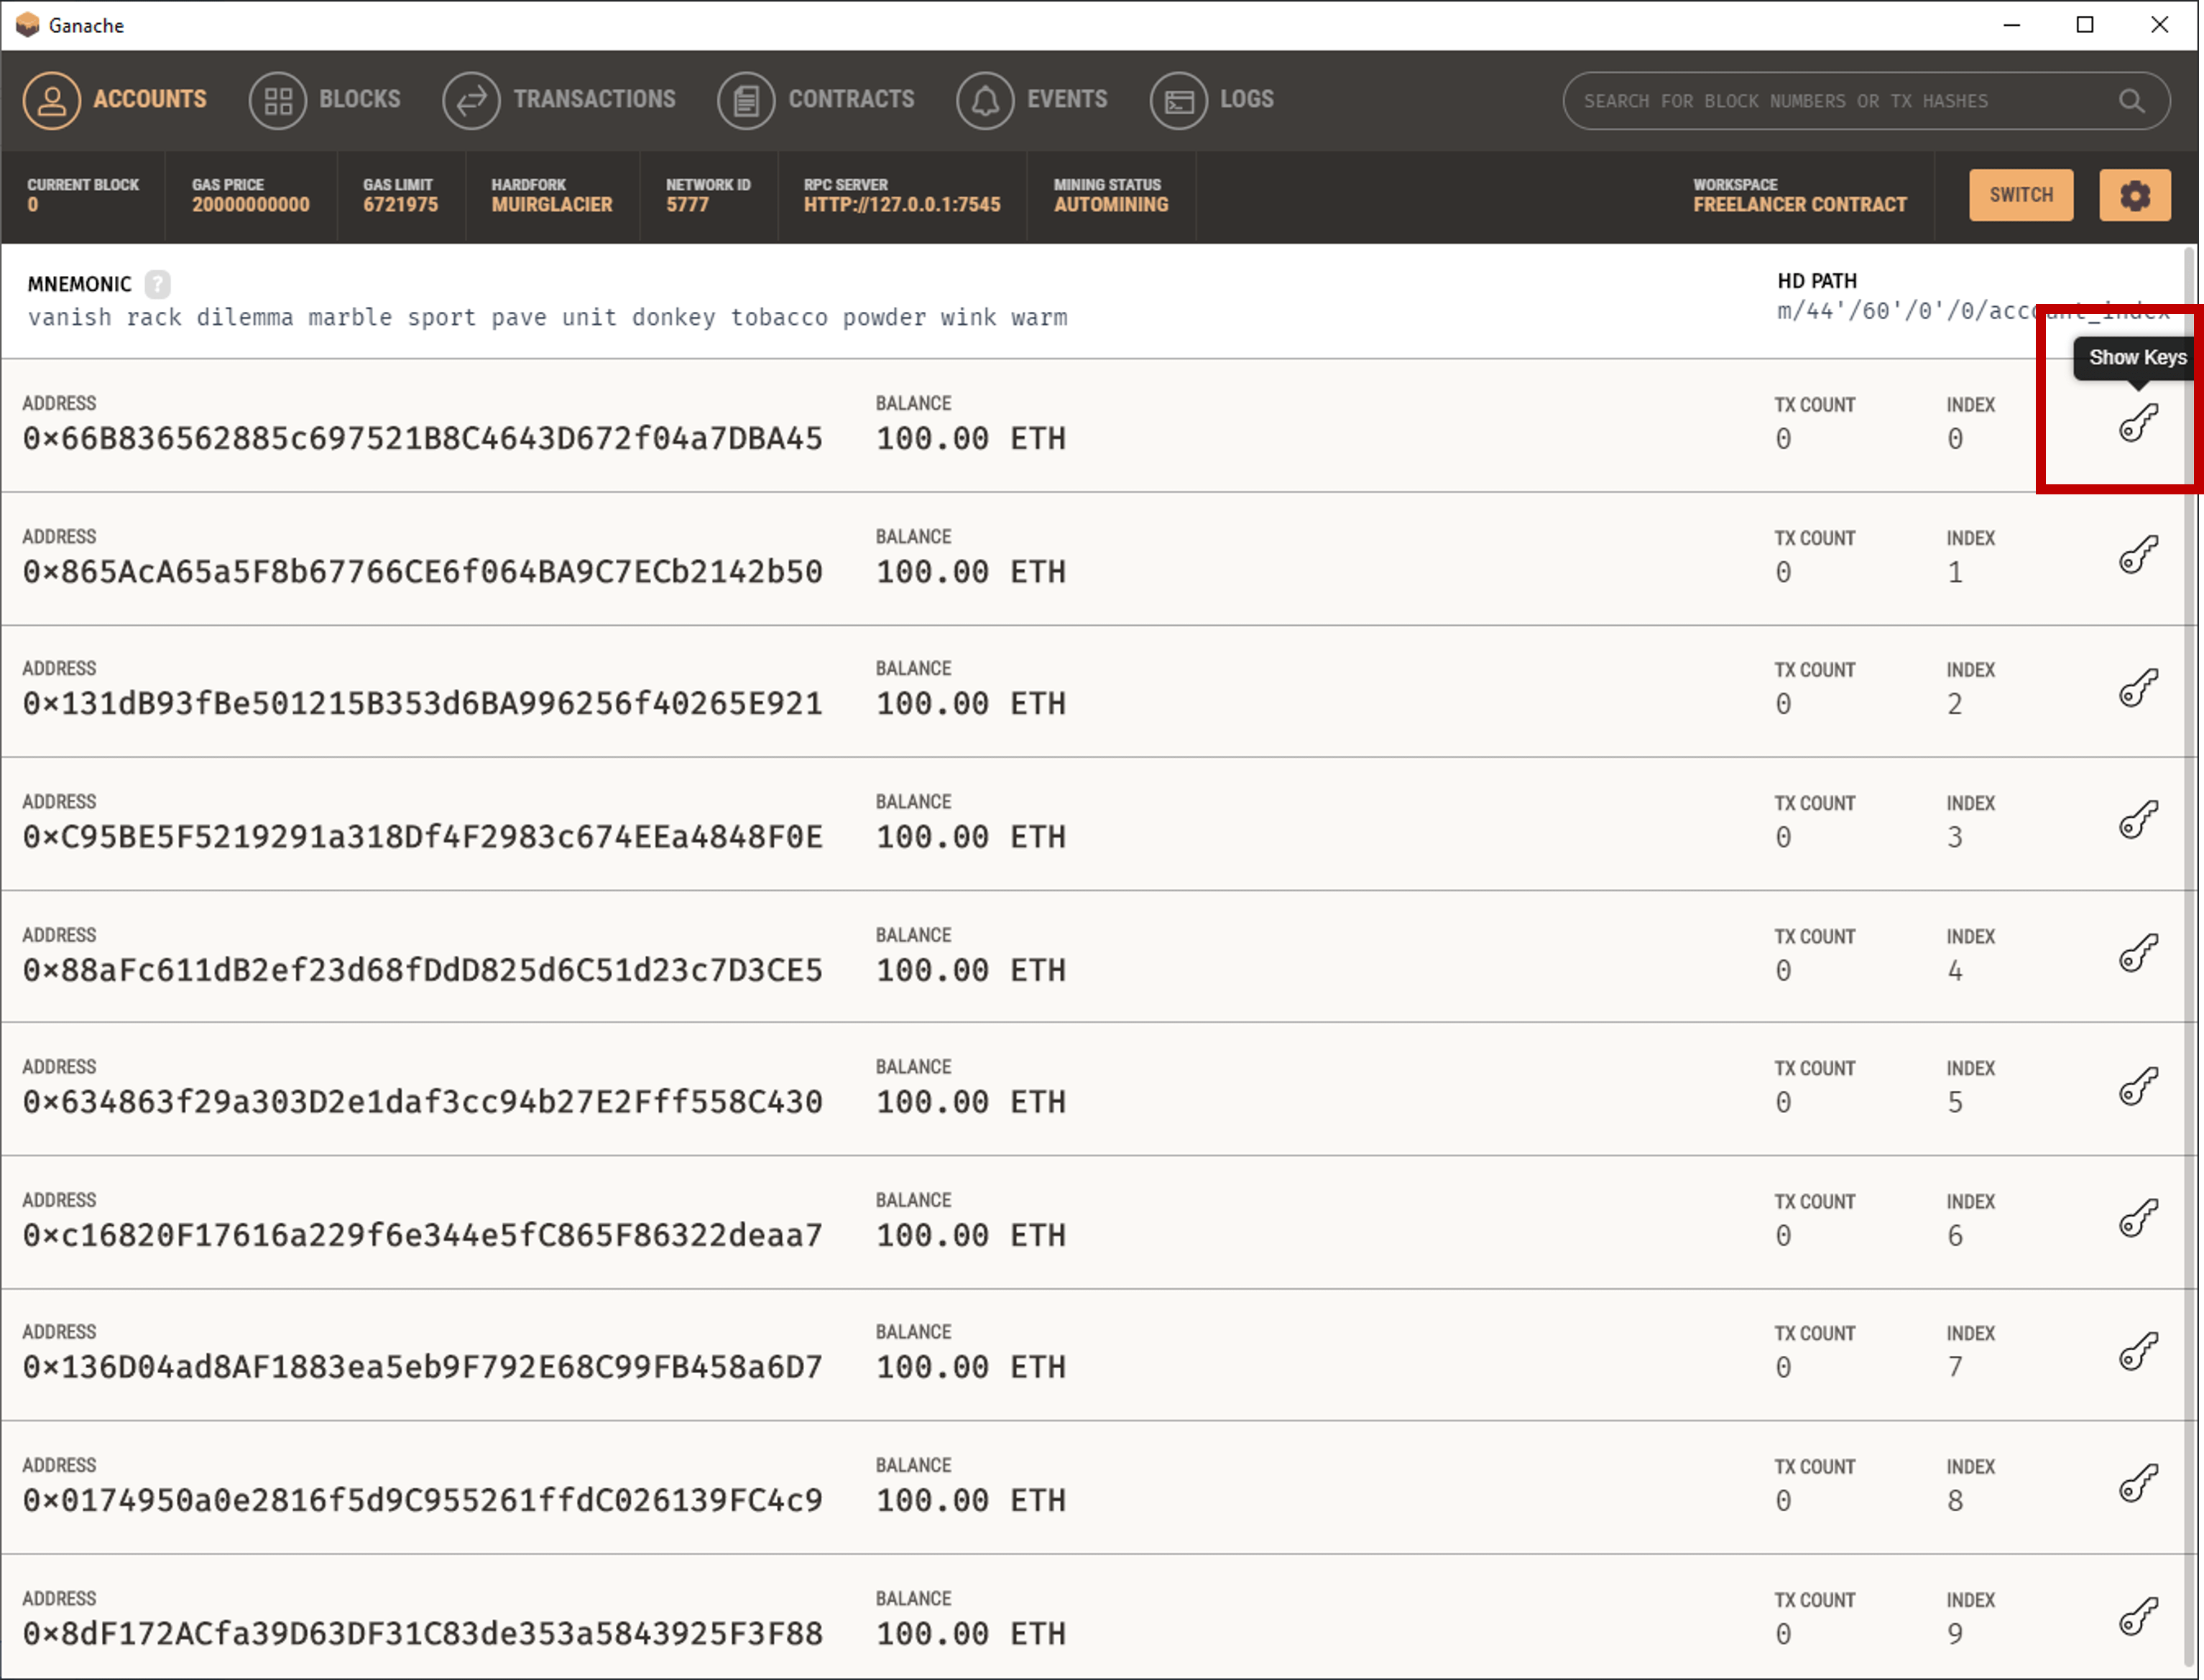
Copy the private key. We will be using this key in the next step.
MetaMask
MetaMask is an Ethereum Wallet. Like a physical wallet where you keep your dollar bills, MetaMask lets you save, spend and transfer ETHs between accounts. MetaMask also allows lets you execute Ethereum transactions and run Decentralized Apps.
Download and setup MetaMask on your Chrome or Firefox browser.
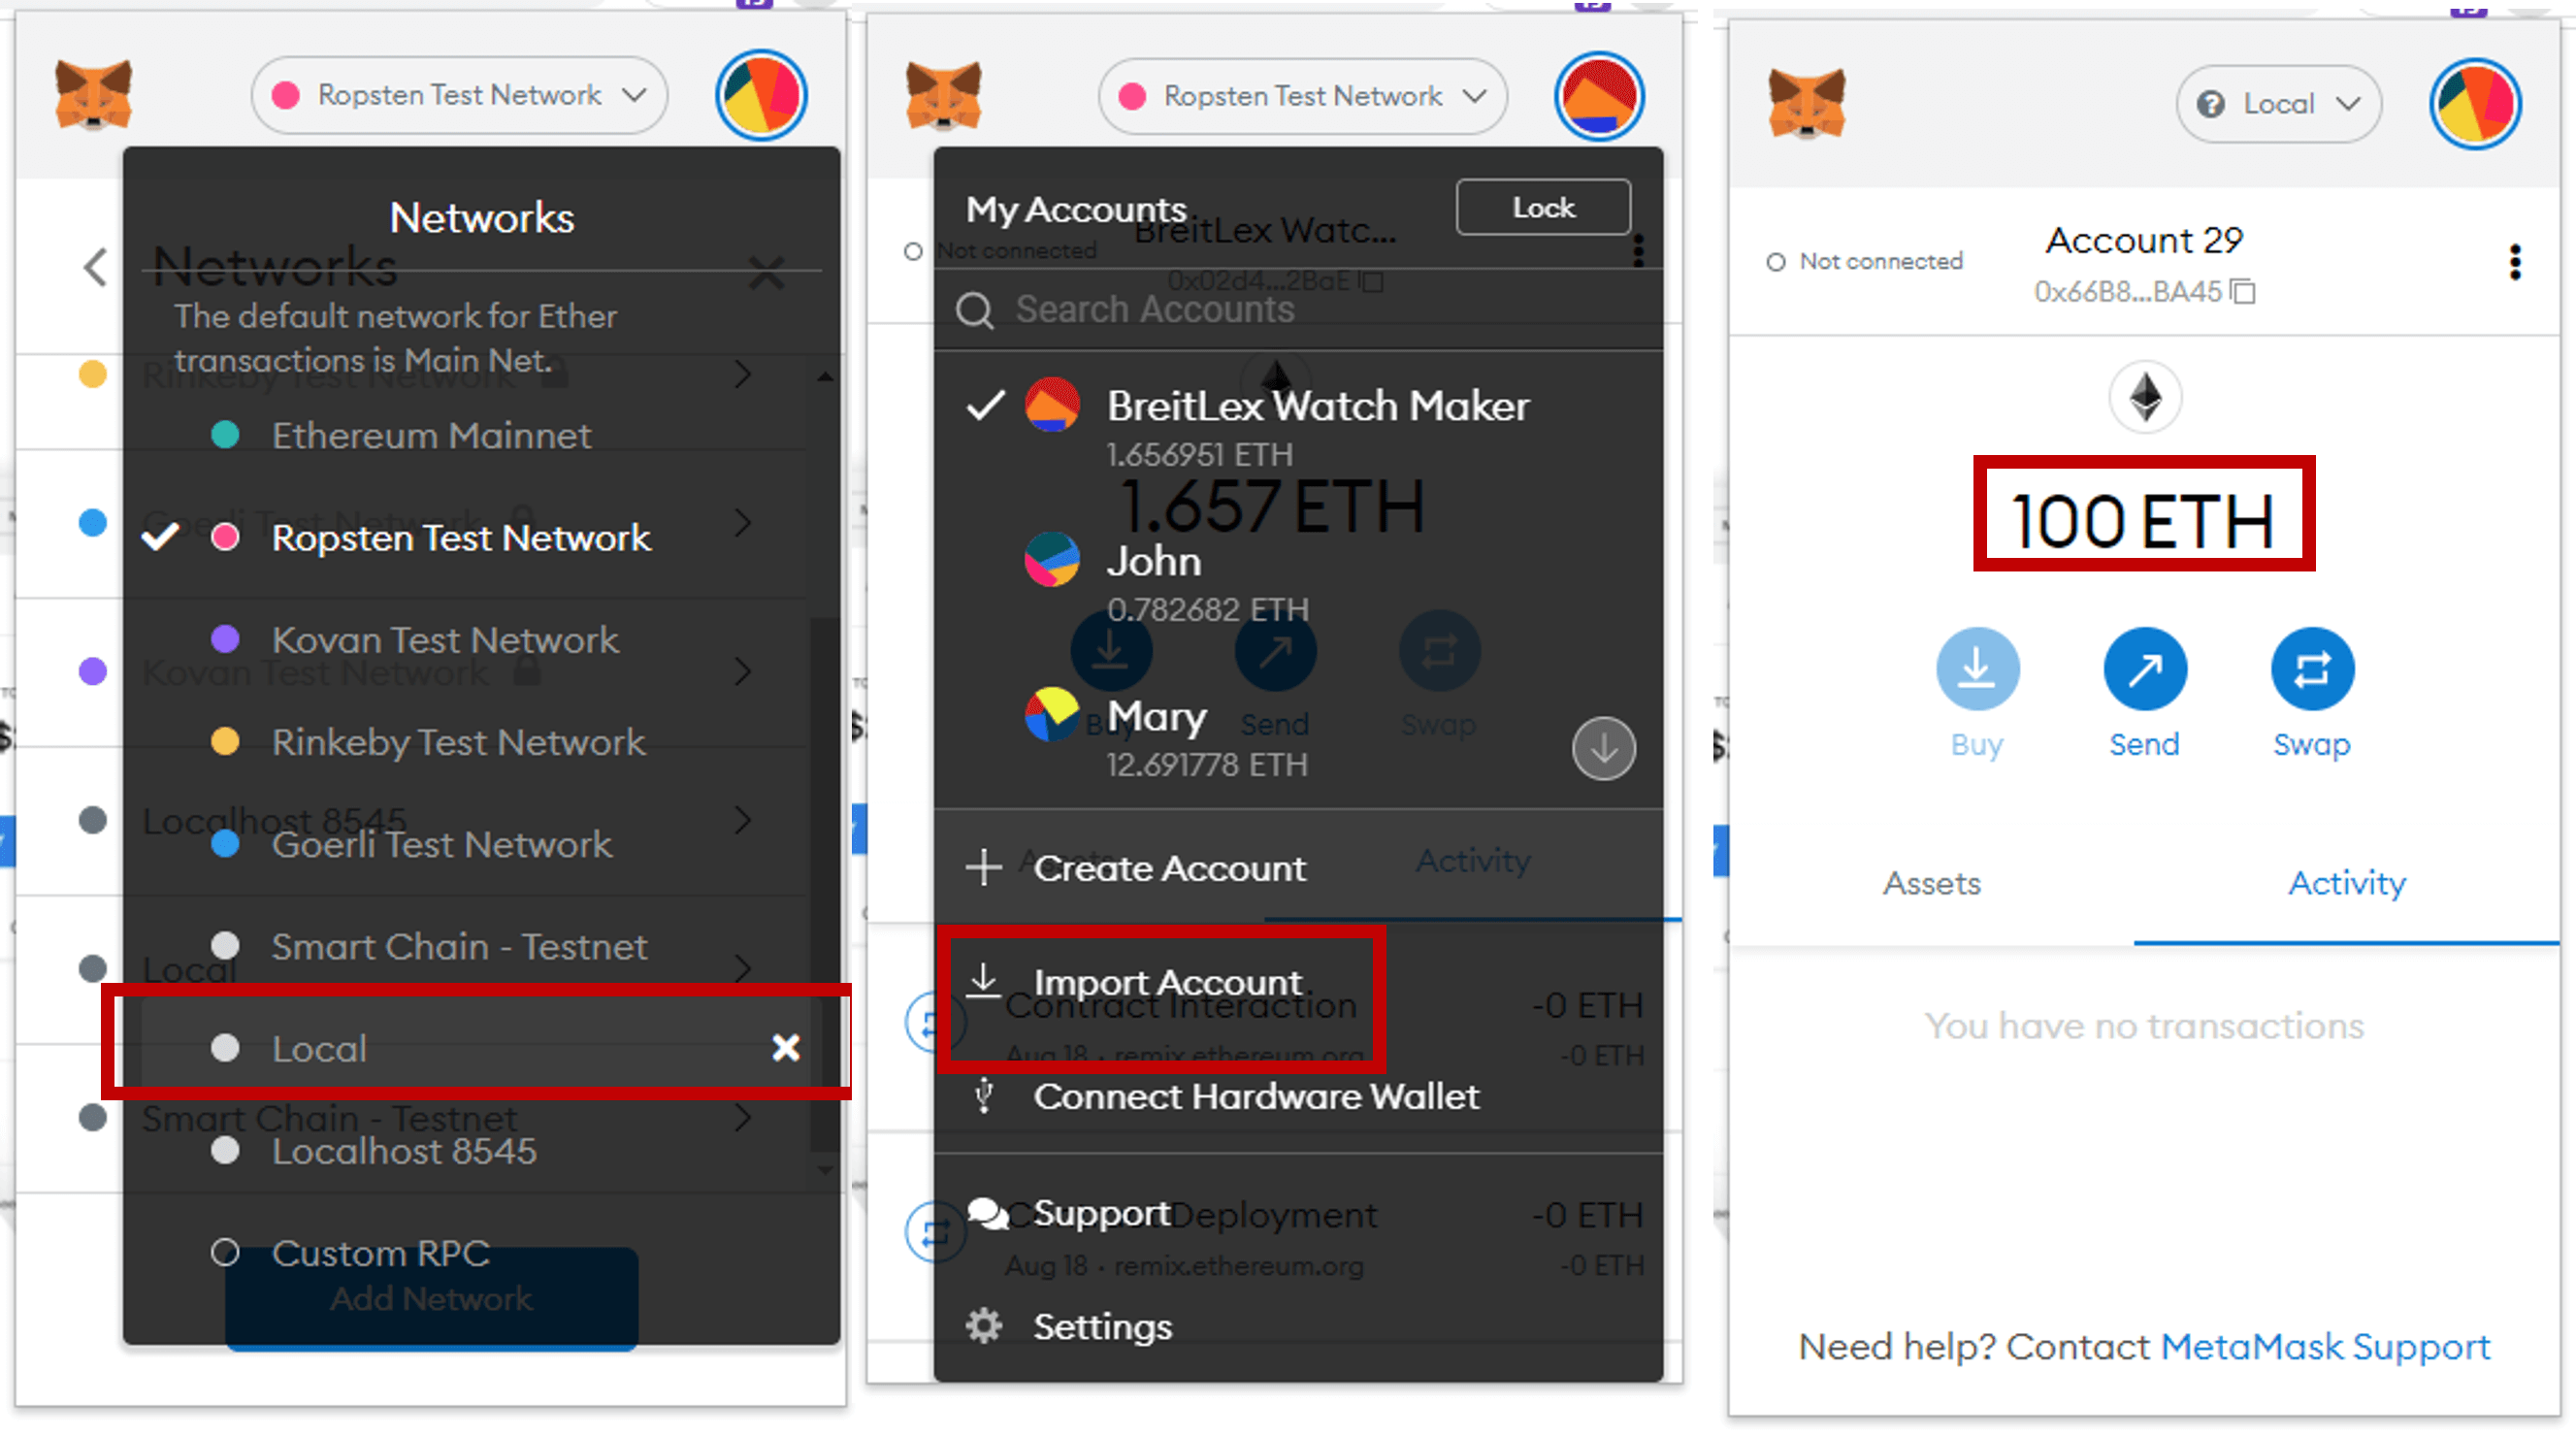
By default, your new MetaMask wallet is connected to the main Ethereum network. We will reconnect it to our local Ganache Ethereum Blockchain. To do this, visit the settings on MetaMask. Add a network with the following settings:
- Network Name: Local (you can call it Ganache, or any other names you prefer)
- New RPC URL: HTTP://127.0.0.1:7545 (you can find this on Ganache under RPC Server
- Chain ID: 1337 (this is the default for Ganache)
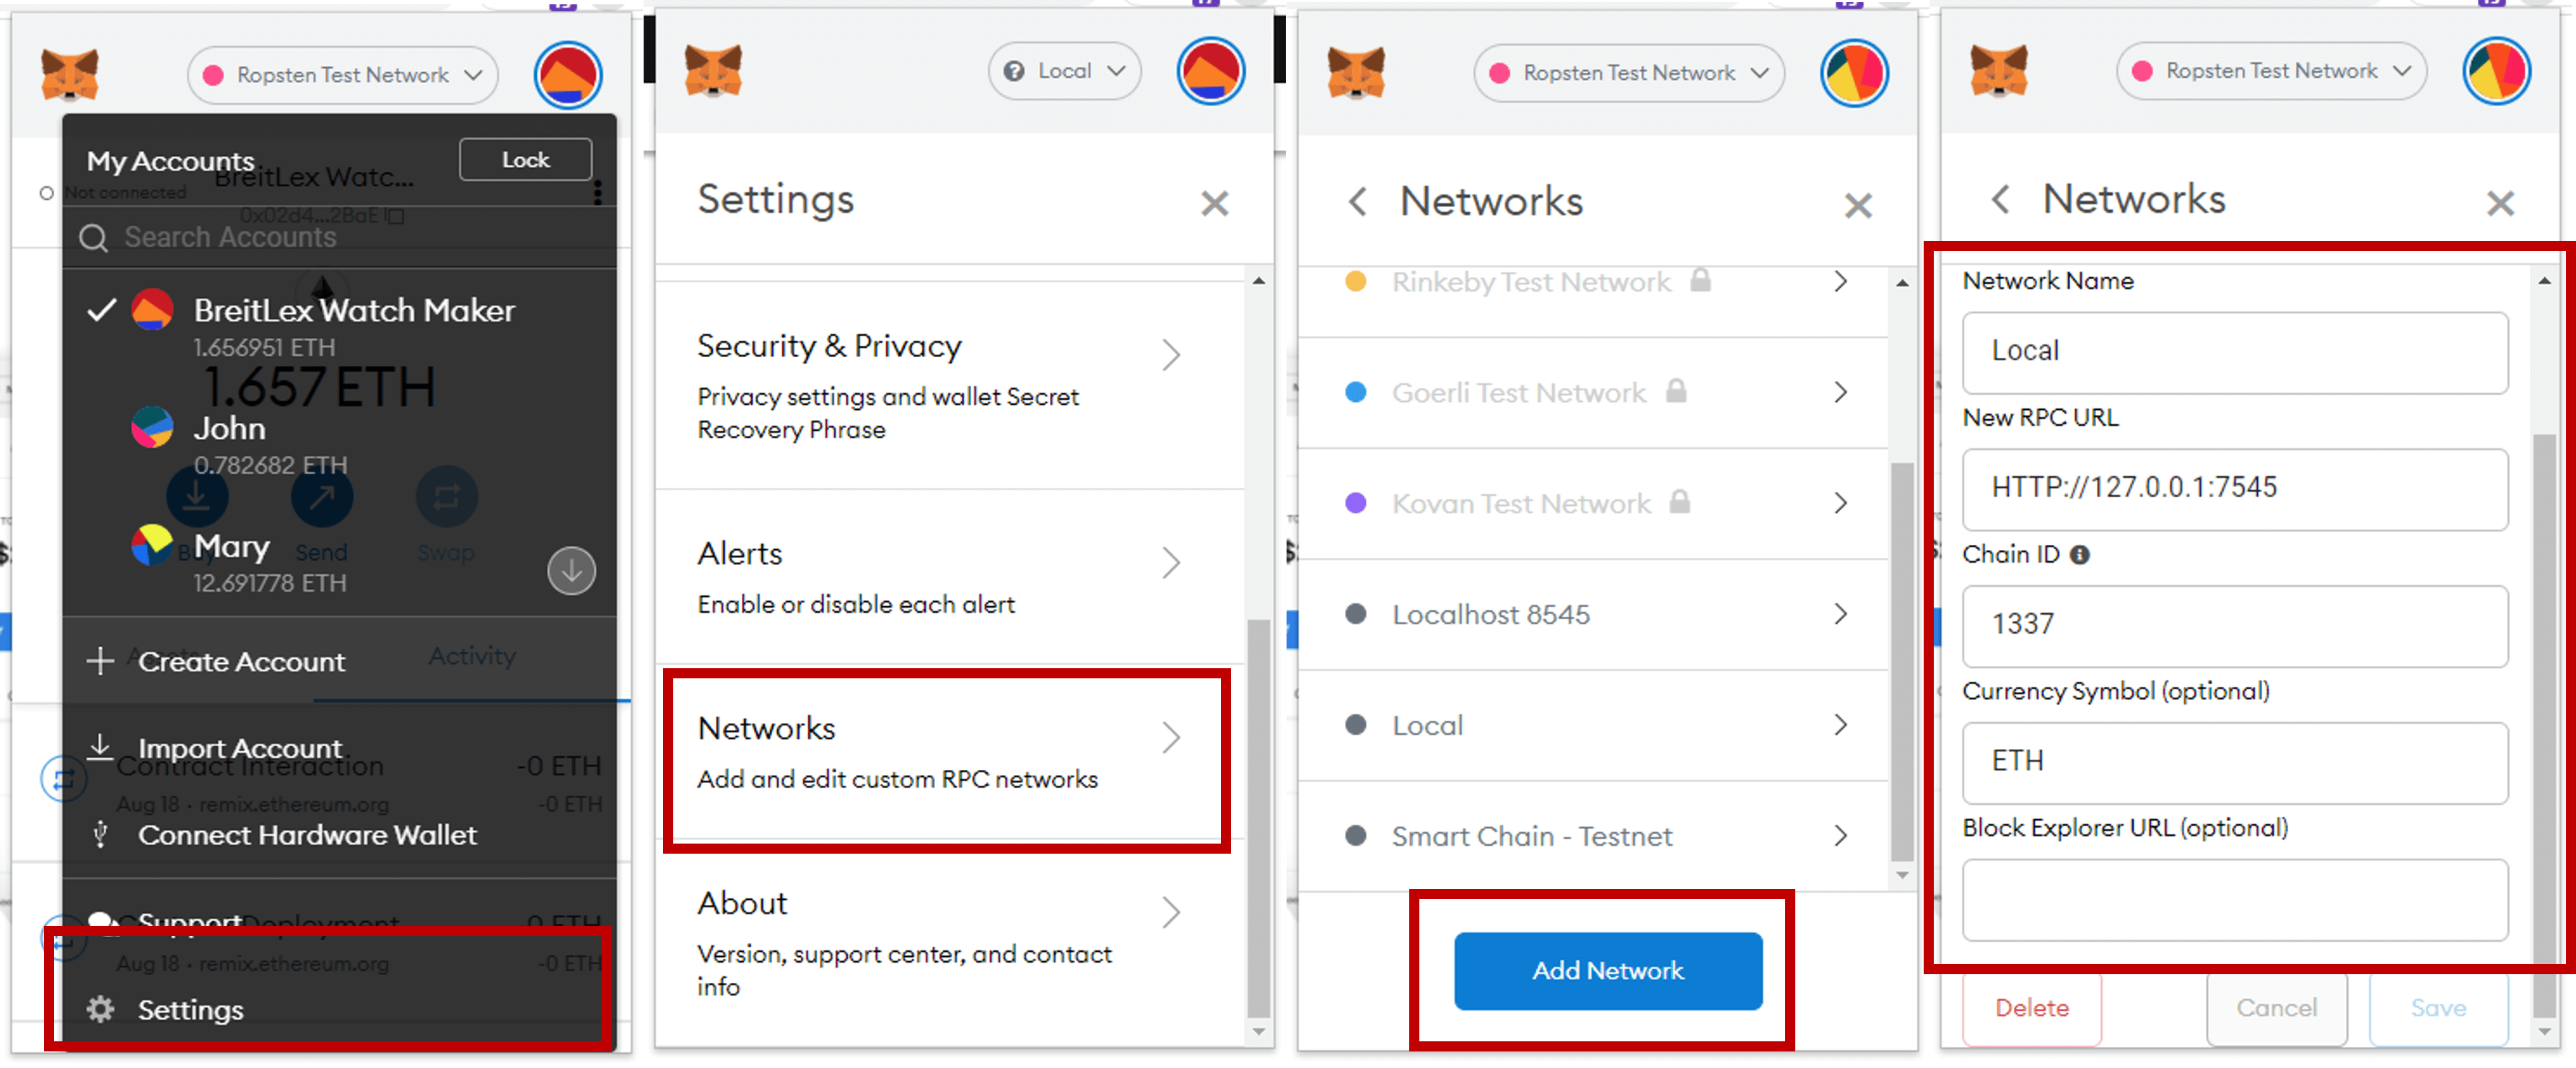
Import an account. Paste the private key that you have copied earlier into the private key textfield. This will import the corresponding Ganache account into your MetaMask wallet. If you have done this correctly, you will see 100 ETH in this account. You may import more accounts from Ganache to MetaMask if you wish.
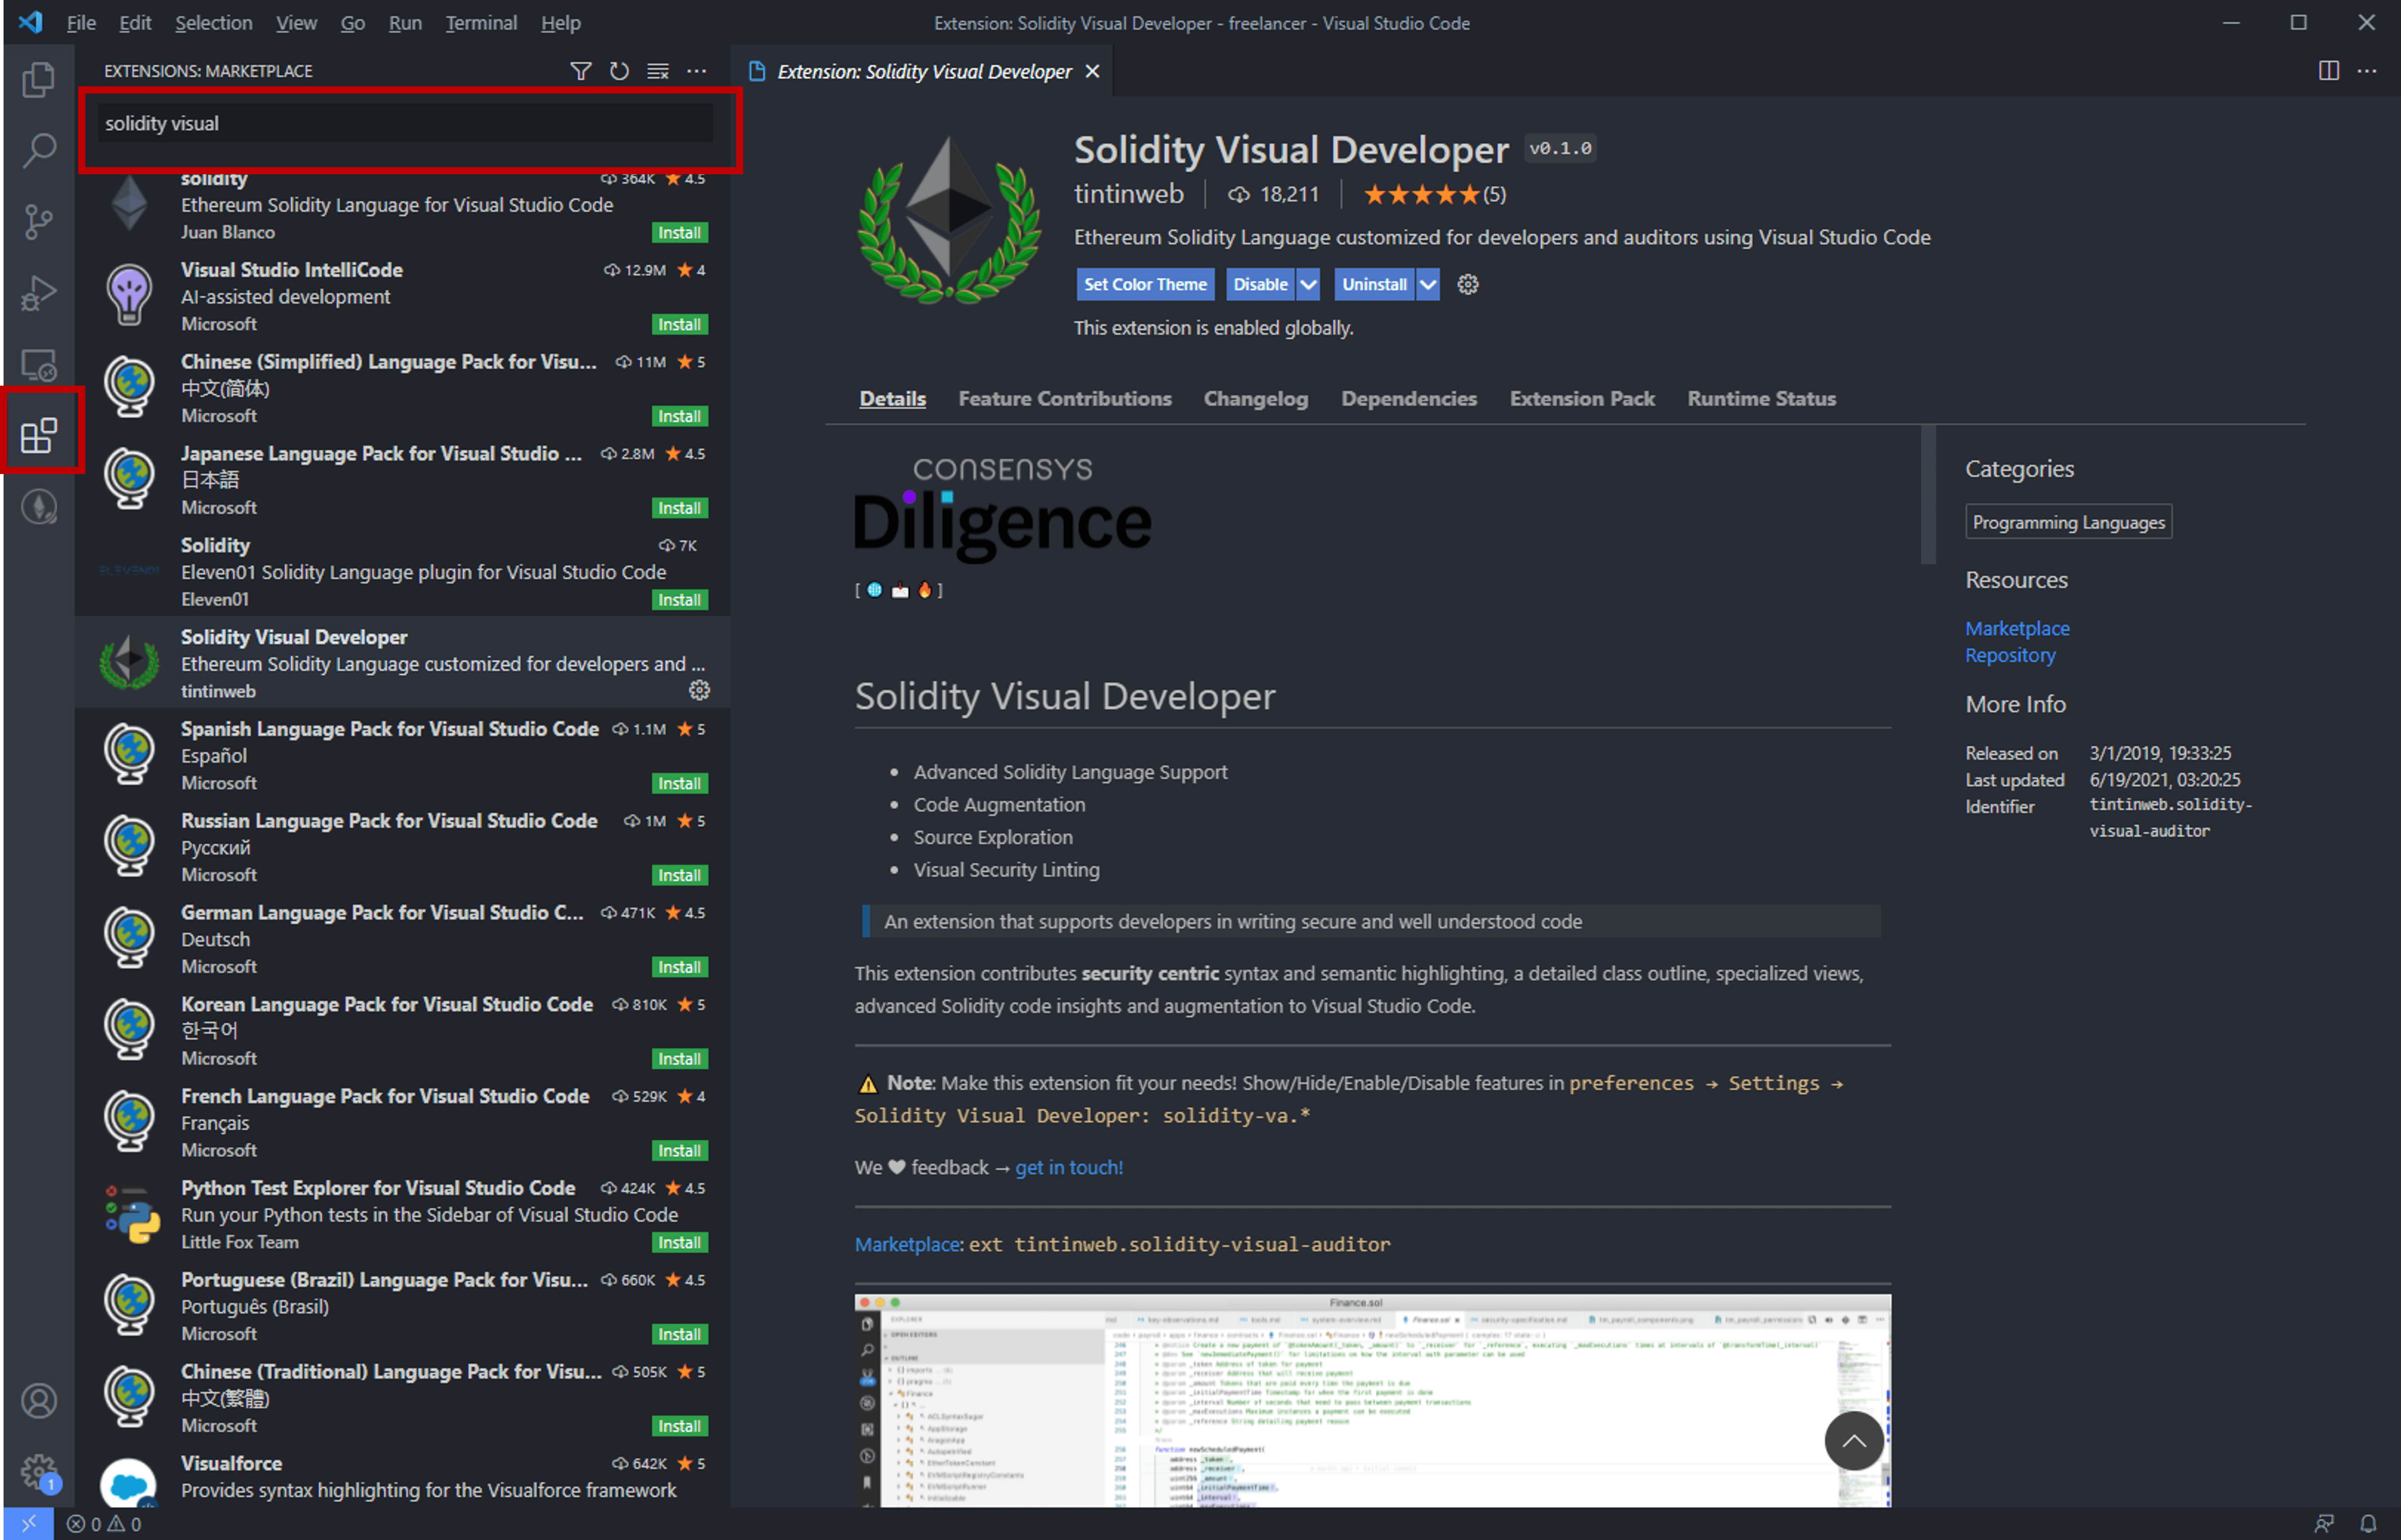
Visual Studio Code
I use Visual Studio Code as my Integrated Development Environment (IDE). I like it because it comes with extensions for Solidity development that I enjoy using. It doesn't really matter which IDE you use. Download and install yours here.
Search for "Solidity Visual Developer" extension and install it. This will provide Solidity language support when you code. I love its funky colored code highlights!
Truffle Box
The folks who built Ganache also built "Truffle Boxes" which are boilerplates that come with the Solidity, Web3 and other libraries that developers need to compile and test their smart contracts and to build the front-end for your Decentralized Apps. There are Truffle Boxes for React Apps, React Native and project samples.
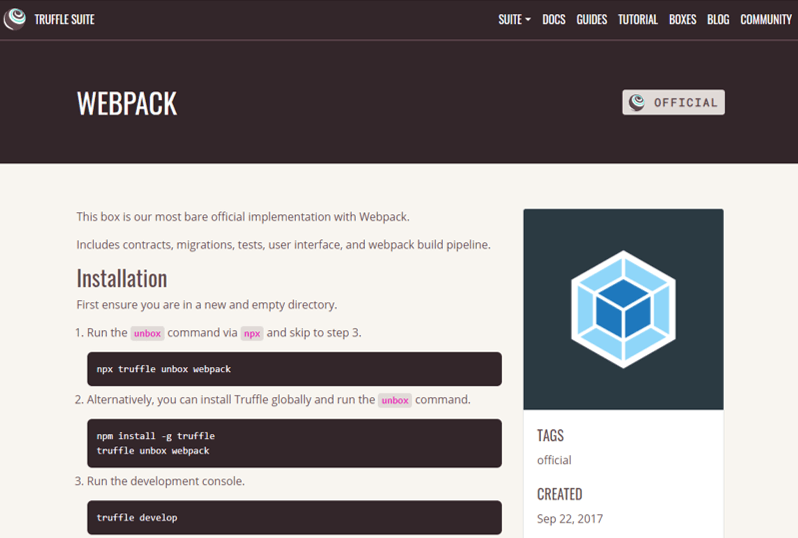
In this tutorial, we are building the Freelancer DApp, a simple HTML/JavaScript/Bootstrap-based Web Application. So we will use the Webpack box.
Install Truffle
npm install -g truffle
We are now ready to develop our Freelancer DApp project. Create a new folder "freelancer" on your computer. Enter the following command to unbox the Webpack boilerplate into the folder:
npx truffle unbox webpack
Open the folder in VS Code. We are ready to start building.
Edit truffle-config.js.
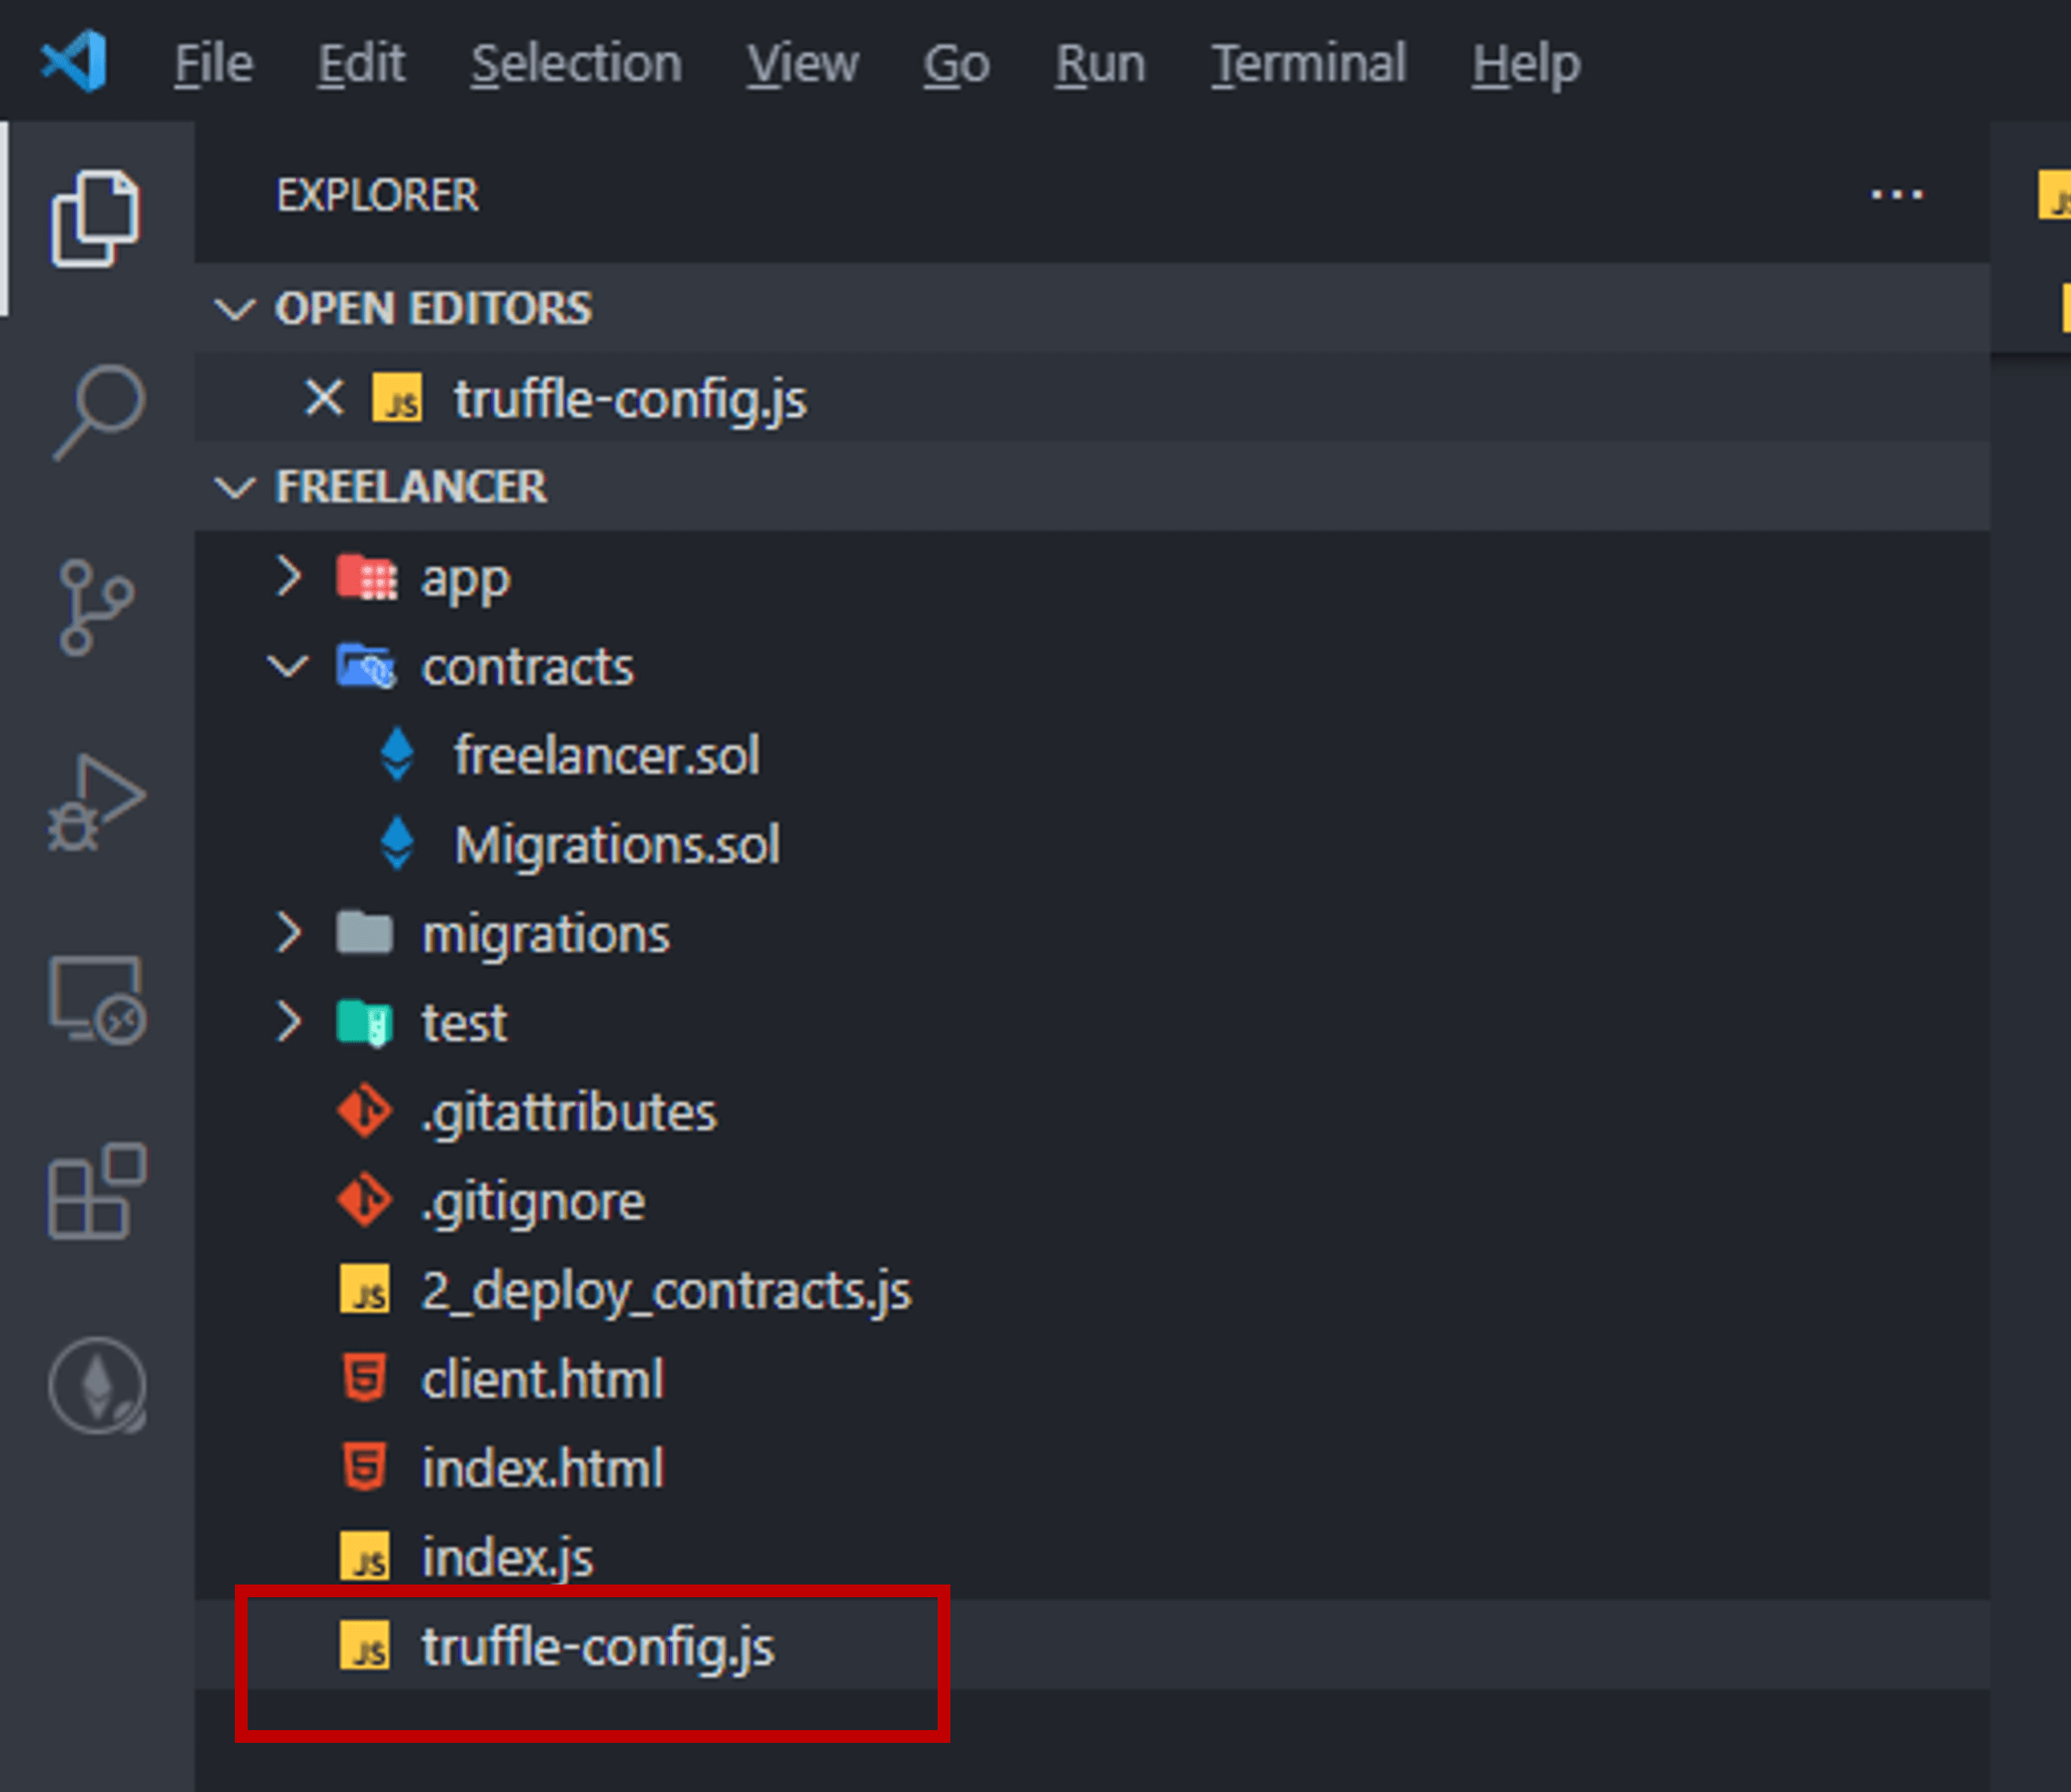
Change the develop settings under network to point to Ganache, since this is where we will be testing our contract:
    develop: {
      host: "127.0.0.1",     // Localhost (default: none)
      port: 7545,            // Standard Ethereum port (default: none)
      network_id: "*",       // Any network (default: none)
    },
Change the Solidity compiler version to 0.8.0 because the freelancer smart contract is written in Solidity 0.8.0:
    solc: {
       version: "0.8.0",    // Fetch exact version from solc-bin (default: truffle's version)
    }
Visit /contracts/Migrations.sol. This is the Webpack boilerplate's migration Smart Contract. Change the Solidity version of the migration Smart Contract to 0.8.0 as well so that it compiles with the correct version of Solidity compiler that we indicated at truffle-config.js.
// SPDX-License-Identifier: MIT
pragma solidity ^0.8.0;

contract Migrations {
    address public owner;
    uint public last_completed_migration;

    constructor() public {
        owner = msg.sender;
    }

    modifier restricted() {
        if (msg.sender == owner) _;
    }

    function setCompleted(uint completed) public restricted {
        last_completed_migration = completed;
    }
}
Compiling & Deploying freelancer.sol
Copy freelancer.sol into the /contract folder.
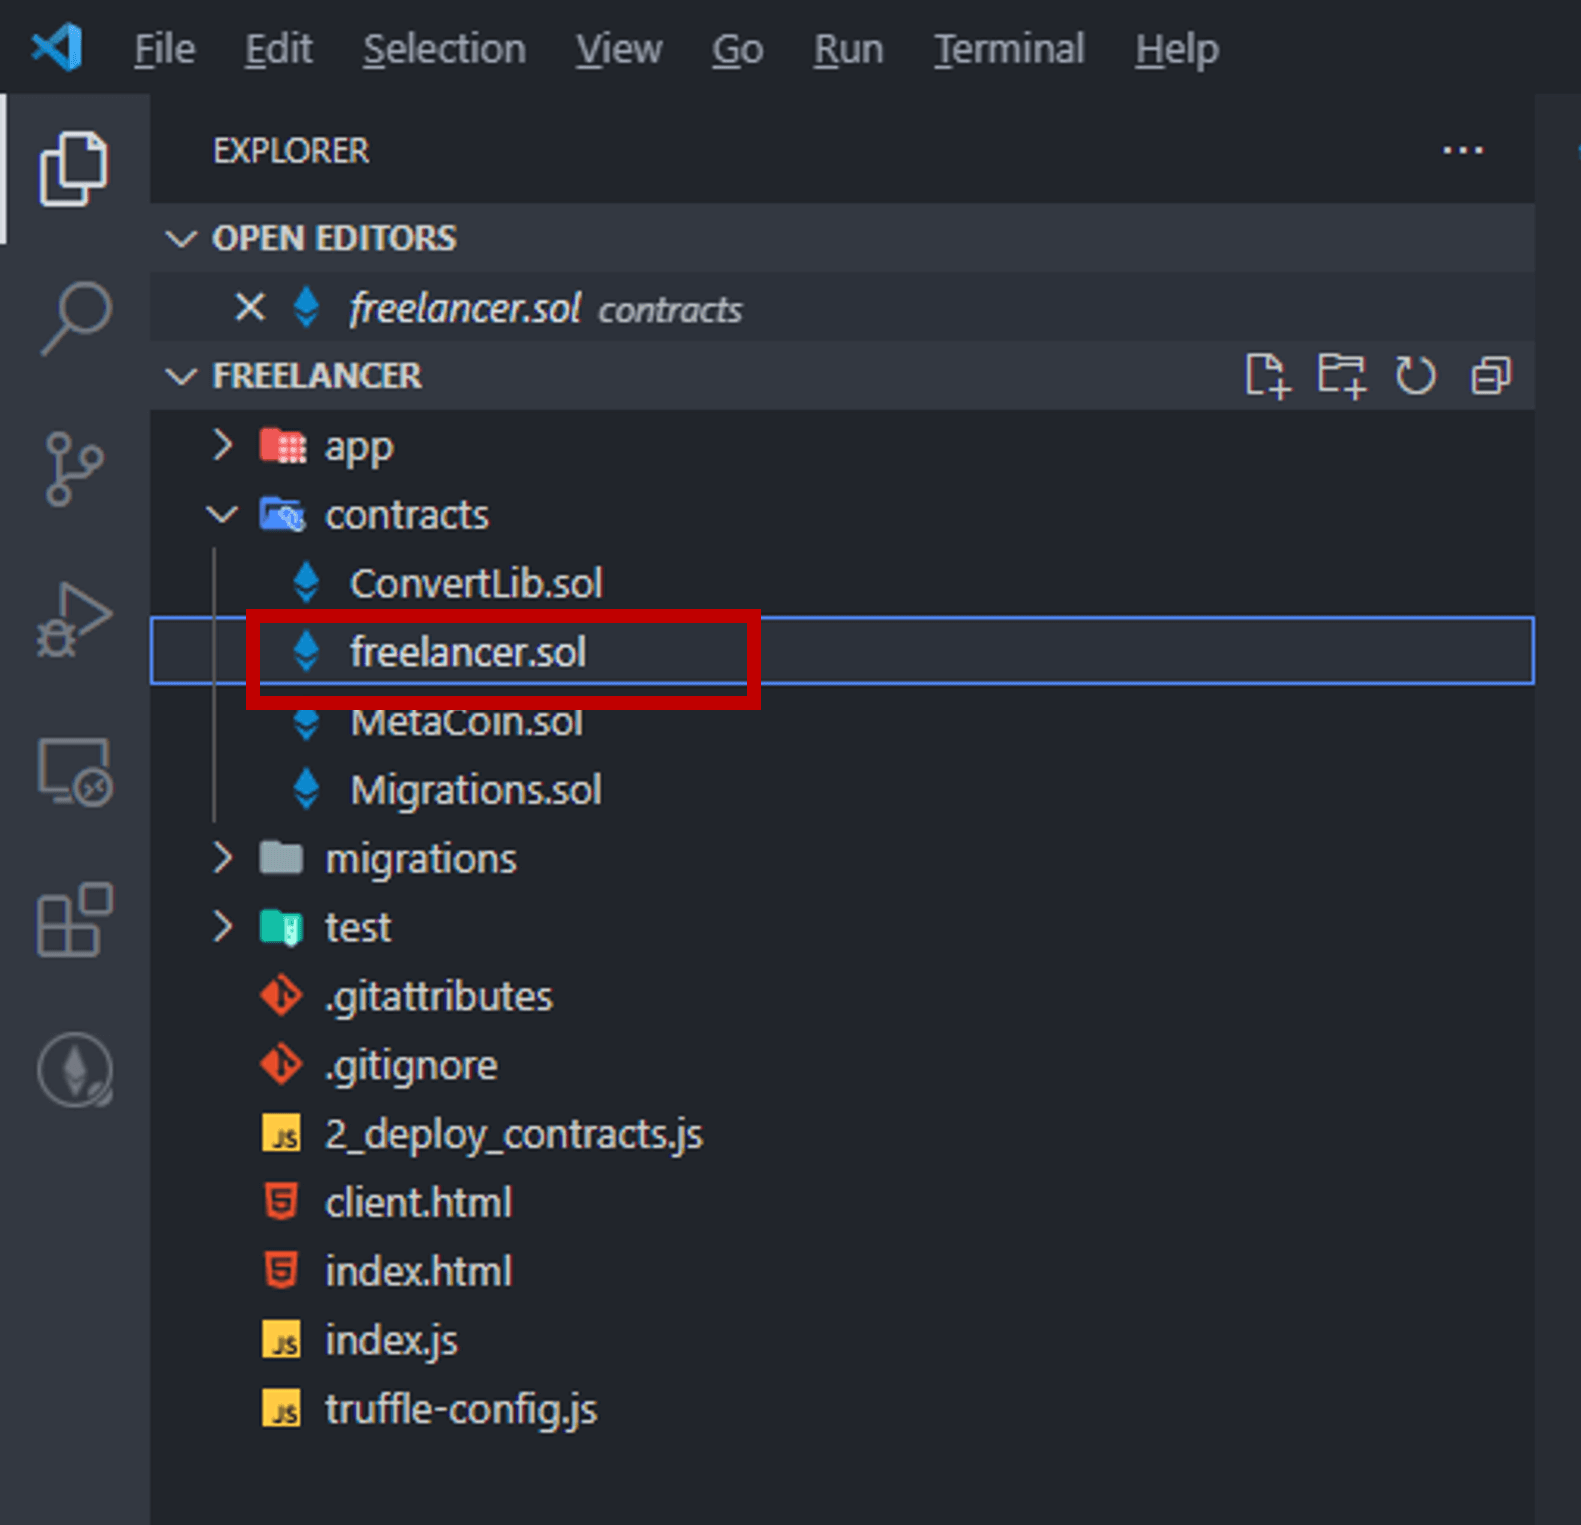
Then run the following command to compile freelancer.sol and migration.sol:
truffle compile
We are now ready to migrate the deploy the freelancer.sol smart contract.
In my migration script, I have coded a basic scenario to execute an end-to-end process, from contract initiation to final payments.
The migration script serves 2 purposes - as a deployment script for the freelancer Smart Contract, and as a test script to backtest the smart contract whenever I make code changes so that I am sure that I haven't broken anything each time I tweak something.
Here are some code snippets:
Connects to the first and second addresses on the local Ganache Blockchain. The first account belongs to the freelancer and the second account belongs to the client:
    //get address for programmer and client wallet
    await web3.eth.getAccounts().then(function(result){
        programmerWallet = result[0];
        clientWallet = result[1];
    });
Freelancer deploys the freelancer contract:
    //deploy freelancer contract
    await deployer.deploy(freelancer, {from: programmerWallet}).then(()=> {
        console.log("Freelance Contract:" + freelancer.address);
      }
    );
Freelancer adds a "Design Phase" to the contract:
    //add design phase to freelancer contract
    await freelancer.deployed().then(
        async function(contractInstance) {
            await contractInstance.addSchedule('DSP','Design Phase', web3.utils.toWei('1.25', 'ether'), {from: programmerWallet}).then(
              function(v) {
                console.log("Schedule Added:"+v.receipt.logs[0].args.shortCode);
              }
            )
        }
    );
Client accepts the contract and funds the design phase:
    //client accept freelancer contract
    await freelancer.deployed().then(
        async function(contractInstance) {
            await contractInstance.acceptProject({from: clientWallet}).then(
              function(v) {
                console.log("Contract Accepted By:"+v.receipt.logs[0].args.clientAddress);
              }
            )
        }
    );

    //client funds design phase
    await freelancer.deployed().then(
        async function(contractInstance) {
            await contractInstance.fundTask(0, {from: clientWallet, value: web3.utils.toWei("1.25", "ether")}).then(
              function(v) {
                console.log("Task Funded:"+v.receipt.logs[0].args.scheduleID);
              }
            )
        }
    );
Freelancer releases funds from the project to himself and then ends the project:
    //programmer releases funds to himself
    await freelancer.deployed().then(
        async function(contractInstance) {
            await contractInstance.releaseFunds(2, {from: programmerWallet}).then(
                function(v) {
                    console.log("Funds Released:"+v.receipt.logs[0].args.scheduleID);
                }
            )
        }
    );

    //programmer ends project
    await freelancer.deployed().then(
        async function(contractInstance) {
            await contractInstance.endProject({from: programmerWallet}).then(
                function(v) {
                    console.log("Project Ended");
                }
            )
        }
    );
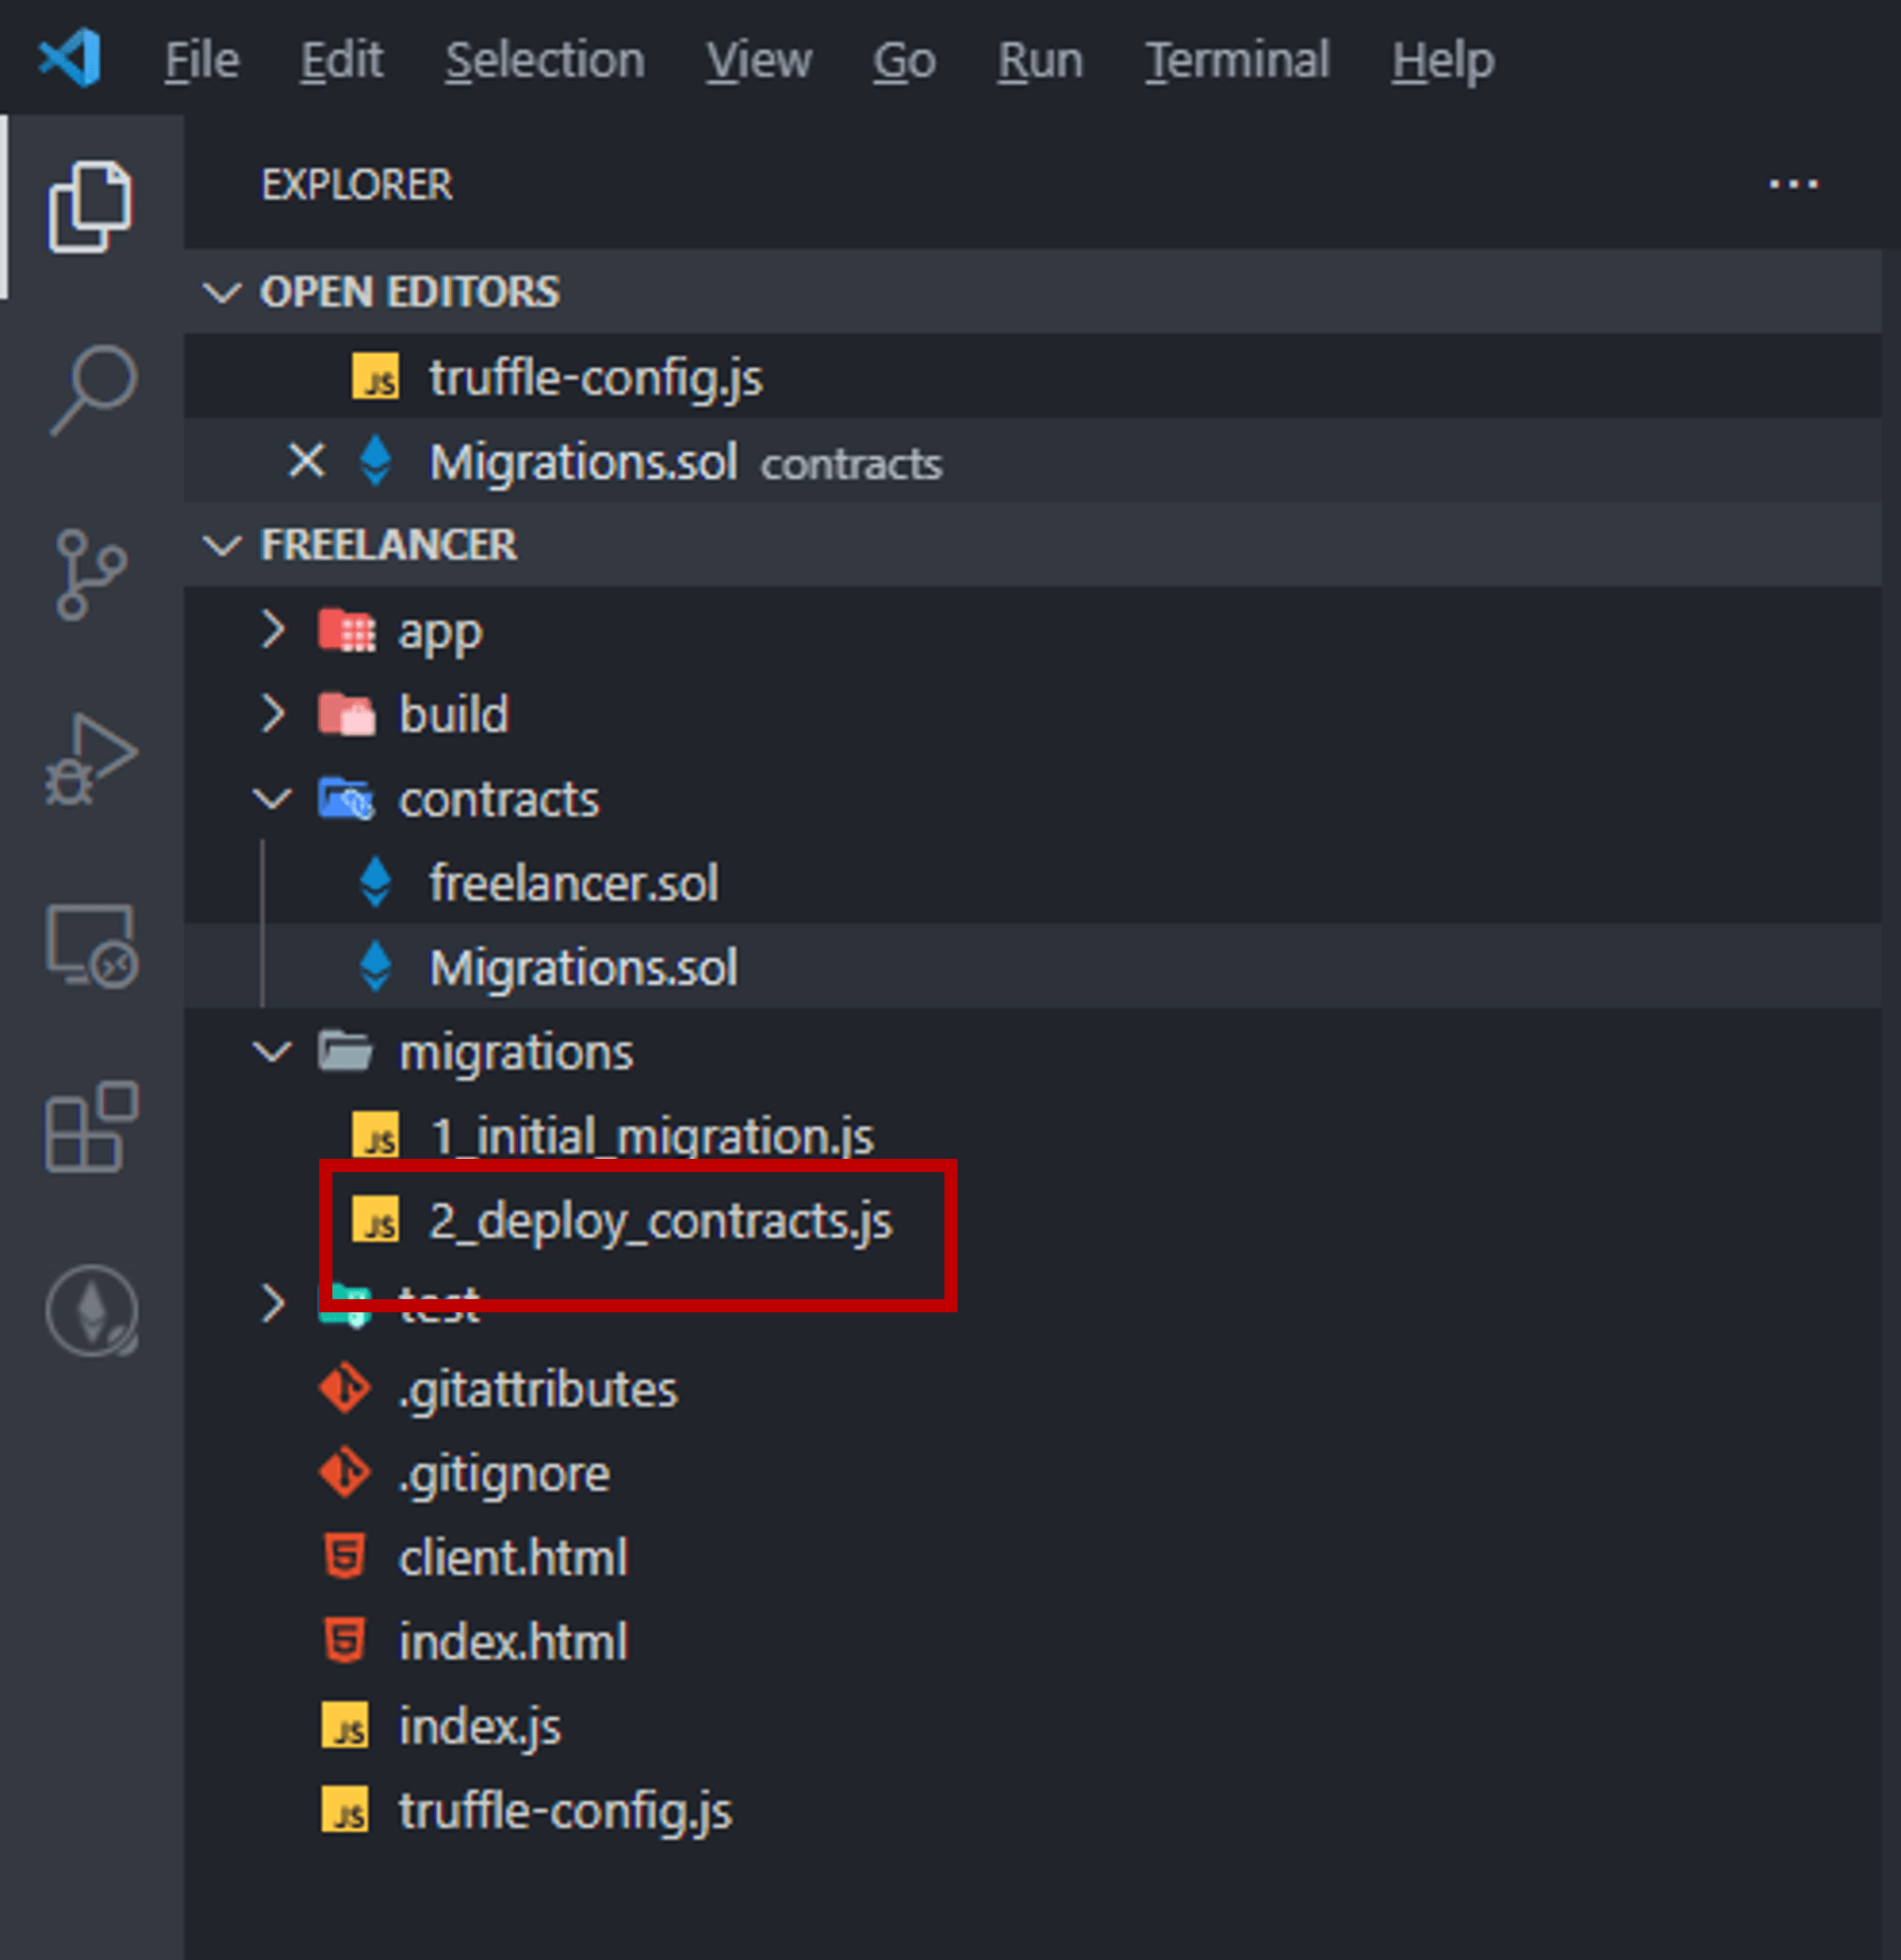
To run the migration script, copy 2_deploy_contracts.js to /migrations.
Now run the following command to migrate, deploy and test the freelancer smart contract:
truffle migrate
Observe Ganache. When run successfully, ETHs from your first wallet would be transferred to the second wallet.
What's Next?
Now that the freelancer smart contract has been developed, tested and migrated, the next step is to build the front-end of this Decentralized Application. We will explore this in the 2nd part of the tutorial.
If you enjoyed this tutorial, perhaps you may also wish to read:
- NFT-Based Luxury Watch Certificate: A demonstration of how it may be possible to replace paper-based certs with Non-Fungible Tokens (NFTs) on the Ethereum Blockchain.
- Freelancer Smart Contract: A payment system between a freelancer and his client to ensure both delivery and payment.
- Ropsten Ethereum Faucet: I built an Ethereum faucet to give out ETH on the Ropsten network.
- Voting on a Blockchain: An implementation of a Voting DApp on Ethereum.
- Deploy a Private Ethereum Blockchain in 10 Minutes with Kaleido: Getting a private Ethereum Blockchain up and running in a jiffy.
- Smart Contract Explained by Demonstration: A demo of an Escrow Service Smart Contract DApp - in my opinion, the fastest way to explain to a layman, what Blockchain is.
- Lottery as a Smart Contract: Decentralized Lottery, an attempt to build a lottery system on the Ethereum Blockchain.
Photo by Alexandru Acea on Unsplash
